Tuesday, December 18, 2012

SPICY PEAR BUTTER


Bookmark and Share


SPICY PEAR BUTTER


INGREDIENTS

Splash Hard Cider (or Cider or Apple Juice)

5 Pears ( 5 1/2 Cups Pear Sauce)

4 Tablespoons Diced Fresh Ginger

2 Tablespoons Lemon Juice

2 Fresh Jalapenos (diced) included seeds for spicier Butter

1 Cup Honey

2 Cups Sugar


DIRECTIONS

This can either be a one or two day process. If you start early in the morning, you can work on this butter throughout the day while you get other chores done around the house.  You can also start cooking down the sauce, remove from the stove top and let it cool, than continue to cook the next day, or you can even slow cook using your oven. Read the directions all the way through and see what will work best for your schedule.

Use a large heavy bottom pan that can be used in the oven and on the stove top, add splash of hard cider, cider or apple juice.

Take 5 pears, wash, cut off stem and blossom end.  Cut into small pieces.  Add to pan with cider.  Heat on medium low, stirring occasionally, until fruit is soft.

Run fruit through a Food Mill using a fine screen.  Return to pan. 

Add honey, sugar and diced ginger.  Cook over low heat stirring regularly until sauce begins to thicken.  You are going to want your sauce to reduce by half at the very least. This can take 4 to 6 hours. Here is where you can set your oven to 250 degrees and reduce overnight, or throughout the day stirring occasionally.  The point is to have intense flavor in a thick fruit butter. 

When your butter has reached the desired consistency, process your jalapenos. Jalapeno peppers add heat and flavour, but if you are cooking with them, you need to exercise some caution. It is best to wear a pair of gloves when handling the jalapenos.

Once you have washed the jalapenos, use a sharp knife to split them open and scrape out the seeds .  Then mince them in a mini food processor or coffee grinder.  Add to your pear butter.  Let it simmer for about 15 minutes.  Taste and adjust honey and or sugar if you like.  Let simmer for another half-hour, to an hour to let the flavors meld.

Now you are going to want to get your canning jars sterilized. The dishwasher is great for this.  If you don't have a dishwasher you can wash the containers in hot, soapy water and rinse, then sanitize the jars by boiling them 10 minutes. Keep the jars in hot water until they are used or leave the jars in the dishwasher on "heated dry" until ready to use. Keeping them hot will prevent the jars from breaking when you fill them with the hot pear butter.

Put the lids into a pan of hot, but not quite boiling water (that's what the manufacturer's recommend) for 5 minutes, and use the magnetic "lid lifter wand" to pull them out.

Fill them to within 1/4 inch of the top, wipe any spilled pear butter off the rim, seat the lid, and finger tighten the ring around them. 

Put them in the Hot Water Bath and boil pint jars for 5 minutes and quart jars for 10 minutes.


If you would like to do a Pear Butter that is not spicy,  follow the same recipe removing the jalapenos. Halve the amount of honey and sugar and then adjust for flavor accordingly. Use crystallized ginger instead of fresh, and add 1/2 teaspoon of allspice and 1/2 teaspoon nutmeg.


There you have it, a little bit of heaven in a jar!


Monday, December 3, 2012

A PANOPLY OF PUMPKIN


PUMPKIN JAM; PUMPKIN SAUCE or JELLY
& ROASTED PUMPKIN SOUP

Bookmark and Share


Amazingly easy to store, incredibly versatile as far as their use in the kitchen, the fall harvest of pumpkins and squash are something you really should consider putting up in your winter pantry. Pumpkins are technically a fruit and a member of the cucurbit family, defined as ‘any creeping flowering plant of the mainly tropical and subtropical family Cucurbitaceae, which includes the pumpkin, cucumber, squashes, and gourds.’

The recipes I am sharing with you feature the sweet sugar pumpkin grown specifically for culinary use, but you could easily replace the pumpkin with a variety of squash such as the delicata, butternut or acorn varieties. Processing the pumpkin flesh for use in any number of recipes can be done by boiling or steaming, but baking is my favorite method. It is quick, easy and will soften up the flesh while cooking away some of the excess water.


Cut your pumpkin in half crosswise and scoop out the seeds and stringy material. I save all the stringy insides and pumpkin skins so that I can create a pumpkin sauce or jelly; the seeds I set aside for roasting. Both recipes are below.

Place the pumpkin halves on a baking sheet, open side down and bake in a preheated oven at 350 °F for about an hour more or less until the flesh is very tender when pierced with a fork. The edges and skin of your pumpkin will most likely be lightly browned, don’t worry, the natural sugars are caramelizing and creating a more robust flavor.


Remove from the oven and set aside until cool enough to handle, then scoop out the flesh. Mash with a potato masher or puree in your food processer. If your pumpkin pulp is too watery, you may drain it through a cheesecloth or a sieve. You can also cook it down to a thicker consistency in a saucepan as you prepare for your final recipes.

In general, a 5-pound pumpkin will yield about 4 cups of mashed, cooked pumpkin pulp. If you have more pumpkin than you need at the moment, place one cup measurements into a freezer Ziploc . Flatten, mark the date on the bag with a Sharpie and place in your freezer. This will make it easier to figure what you need for your recipes, 3 Ziplocs equal 3 cups, keep for 6 months or more in the freezer.


PUMPKIN JAM

INGREDIENTS

4 cups mashed Pumpkin

3 cups Sugar

4 Tablespoons crystallized Ginger, diced

3 Tablespoons Lemon Juice

1/2  teaspoon Nutmeg

1/2  teaspoon Allspice

10 - 12 half pint canning jars.

Do not use  canning jars any larger than a half pint for this recipe.


DIRECTIONS

If your pumpkin is watery, gently simmer to evaporate.  Add sugar and allow to stand overnight.

Turn crystallized ginger, lemon juice, and spices into pumpkin–sugar mixture. Adjust to taste.

Cook slowly over medium heat until the mixture is thick.

Spoon into sterilized pint jars leaving 1/4 inch headspace, seal, and process in boiling water bath for 15 minutes.


PUMPKIN SAUCE OR JELLY

INGREDIENTS

Stingy insides, parings, scrapings and skin from a sugar pumpkin

Water

3 Cups Raw Sugar

Cinnamon Stick

Star Anise

1/2 teaspoon Nutmeg

1/2 teaspoon Kosher Salt

1/2 teaspoon Butter

For Jelly

1 cup Apple Cider Vinegar

2 pouches of liquid Pectin

5 - 6 half pint Canning Jars


DIRECTIONS

Place all your pumpkin cuttings into a heavy bottom pan along with the Cinnamon Stick and Star Anise, cover with water and bring to a simmer. I usually let the pot simmer for several hours until the liquid is fragrant with a good color. Stir ocassionally.

Remove from stove top,  let cool, turn into a sieve or chinois and let drip overnight. Do not press or squeeze any of the pulp.

Measure your pumpkin juice, you will need at least 3 cups. If you are short juice, boil water and pour over pulp.  Add drippings until you measure 3 cups.

If you are MAKING JELLY combine pumpkin juice with nutmeg, salt, butter, cider vinegar, and sugar. Bring to a boil over high heat. Boil 10 minutes, stirring constantly.

Add liquid pectin, immediately squeezing entire contents from pouches. Continue to boil hard for 1 minute, stirring constantly. Remove from heat and skim foam if necessary.

Ladle hot jelly into hot jars leaving 1/4 inch headspace. Wipe rim. Center lid on jar. Apply band until fit is fingertip tight.

Process in a boiling water canner for 10 minutes, adjusting for altitude. Remove jars and cool. Check lids for seal.

If you are MAKING SAUCE combine pumpkin juice with nutmeg, salt, butter, and sugar. Bring to a boil over high heat. Boil 10 minutes, stirring constantly. Reduce heat adjust spices.  Continue to simmer until thick.

Ladle hot jelly into hot jars leaving 1/4 inch headspace. Wipe rim. Center lid on jar. Apply band until fit is fingertip tight.

Process in a boiling water canner for 10 minutes, adjusting for altitude. Remove jars and cool. Check lids for seal after 24 hours.


Pumpkin Sauce can be poured over pound bread, ice cream, or replace for one cup of milk with one cup of pumpkin sauce  when making Rice Pudding. Delicious!
While there are numerous ways to use pumpkin sauce, there are equally as many recipes for Pumpkin Soup. For example, Canadian Living.com adds a McIntosh apple, caraway seed and white pepper to their version, while Martha Stewart prefers shitake mushrooms and vegetable stock in her pumpkin soup.


I cannot help but have a New England influence in my variation, I come from a long line of independent Yanks, so I make use of bacon fat, apple cider, chicken stock, and a splash of sherry (because I usually have some in the cupboard from making Sherried Strawberry Jam).

The point is, like Chicken Soup that Grandma use to make, all you have to do is go through the pantry and take stock of what is available and get creative.


ROASTED PUMPKIN SOUP


INGREDIENTS

1 small (4-pounds more or less) Sugar Pumpkin, cut in half and seeds removed

1 Tablespoon Bacon Fat  (or olive oil )

Kosher Salt

Freshly ground Black Pepper

1/2 cup small-dice Shallots or Yellow Onion

1/4 cup dry (fino) Sherry

1/2  teaspoon Nutmeg

2 cups Chicken Stock or Chicken Broth

2 cups Apple Cider

1 teaspoons finely chopped fresh Sage leaves plus some whole for garnish

1/4 cup Milk (optional)

Toasted Salted Pumpkin Seeds (recipe below)


INSTRUCTIONS

Heat the oven to 350°F and arrange a rack in the middle. Place on a baking sheet cut-side down and roast until fragrant and tender when pierced with a fork, about an hour. Remove from the oven and let sit on the baking sheet until cool enough to handle, about 20 minutes.

Using a large spoon, scoop out the flesh, place it in a medium bowl (you should have about 3 cups), and set it aside.

In a large Dutch Oven add the shallots or onions to the bacon fat or olive oil, season with salt and pepper, and sauté until softened, about 4 minutes. Add the sherry and cook until reduced by half, about 2 minutes. Add the stock or broth, apple cider, thyme, and reserved pumpkin and season with salt and pepper and nutmeg. Stir to combine, and then bring to a simmer. Reduce the heat to low and simmer until the flavors have melded, about 10 minutes.

Using a stick or tabletop blender, purée the soup (in batches) until smooth. Place the blended soup in a clean saucepan. Stir in milk and adjust seasonings as needed.

Serve garnished with pumpkin seeds and sage leaves, if desired.


TOASTED PUMPKIN SEEDS


Pumpkin seeds resting before roasting.

It helps, if you are going to eat pumpkin seeds with the shells on, to use the seeds from sugar pumpkins. Somewhat smaller than carving pumpkin's seeds, though you can use the seeds from them also, whichever you choose, boil them in salted water first and then toast them in the oven. This will assure just the right amount of crunch, instead of having the shells being tough and hard to chew.


INGREDIENTS

One medium sized pumpkin

Salt

Olive oil


DIRECTIONS

Cut open the pumpkin. Use a strong metal spoon to scrape the insides scooping the seeds and strings into bowl. I take the time to separate the seeds onto a baking sheet and retain the other ‘insides’ for making a Pumpkin Sauce (recipe above). Set the seeds aside to dry until you have time to get back to them.

Measure your pumpkin seeds in a cup. Place the seeds in a medium saucepan. For every half cup of pumpkin seeds, add 2 cups of water and a tablespoon of salt to the pan. Add more salt if you would like your seeds to be saltier. Bring the salted water and pumpkin seeds to a boil. Let simmer for 10 minutes. Remove from heat and drain.

Preheat the oven to 400°F. Coat the bottom of a roasting pan with olive oil, a tablespoon more or less. I like to shake my seeds in a bag of mixed spices: Spanish paprika, turmeric and salt is my personal favorite, but you can experiment with a variety of spices and seasonings, before spreading in a single layer on the roasting pan.

Bake on the top rack of the oven until the seeds begin to brown. Small pumpkin seeds may toast in around 5 minutes or so, large pumpkin seeds may take up to 20 minutes, but watch them so they do not burn.

Once the seeds are toasted, remove the pan from the oven and let cool on a rack. Let the pumpkin seeds cool all the way down before packing into a jar. Pumpkin seeds are healthy snacks, are fun for garnishes, and are always appreciated as gifts in pretty jars.

Friday, October 19, 2012

SWEET PRESERVATION: Nectarine Jelly


Bookmark and Share


As Sweet Preservation points out,  'A canning resurgence is sweeping the nation, as people everywhere bottle up the bounties of the season and celebrate an art that’s once again au courant.'

Canning and preserving are enjoying a strong rebirth, and in my book nothing really beats a traditional single fruit jelly.  Tried and true they should be a staple in your larder, not only because there really is nothing tastier than a sweet jelly on warm toast, but because they are also a wonderful base for so many other recipes, whether it be a sweet glaze on a tart or a cake, or a savory base for a meat dish or stew. That is why I chose to make a Nectarine Jelly with some of the bounty I received from the Washington State Fruit Commission.

While it is a bit of work to make the fruit juice required to create a colorfully translucent jelly, it is well worth the effort.To make good jelly, a proper ratio of fruit, pectin, acid and sugar is required; do not fret, it is not nearly as complicated as it sounds.

The fruit you choose to make into jelly provides the color and, obviously, flavor. It also furnishes some of the pectin and acid needed for a good set. So, an apple jelly will be golden, plum will be purplish, cherry red, peach peachy, and nectarines a mellow rosy-orange hue. Fruit used for jellies should be just barely ripe. Since they will be cut up, and/or mashed, fruits of all sizes and shapes can be used as long as you trim out the bad bits.

Pectin and sugar is the what causes the fruit to gel. Some fruits provide enough natural pectin, others require added pectin, especially when making jellies. Click here for an easy guide. Lemon juice is always a wise additive as it will help provide the acid also needed for a good gel.

When making jelly it is essential to whisk the powdered pectin into the fruit juice until it is completely incorporated, the pectin must be fully dissolved before adding the sugar. I always mix in the pectin when the juice is slightly warmed to facilitate its dissolving completely. Once the juice-pectin is completely blended it is brought to a hardy boil before the sugar is added. The sugar is always added all at once, which can be a bit scary your first few times, but have faith and just keep stirring.The sugar, too, must also be completely dissolved, or it can become granular as the jelly sits in the pantry. Not a complete disaster, crunchy jelly is, well, interesting and edible, but not really quite as satisfying.  Can you tell I've rushed a batch or two in my time?

Commercial pectins are made from apples or citrus fruit and are available in both the powdered and liquid forms. Be sure to follow the manufacturer’s directions or tested recipes when using commercial pectin and remember, powdered and liquid forms of pectin are not interchangeable. When making this jelly you will use the powdered form.  

I make a homemade pectin which I use in jams and compotes,but using the homemade pectin can be a bit tricky. You need to be as fearless as Julia Child and not be tied to a uniform consistency, some jams will be thicker, some saucier, but I've found them all to be delicious.

There are modern pectin products available to use for making jellies with no added sugar or with less sugar than old-fashioned recipes. Specific recipes are included in the pectin packaging and if you follow them you'll become a jelly and jam making pro in no time, but if you'd like to try your hand at making your own pectin, click here to find out how.

I do use these new pectins when lowering the sugar or using honey in my jams because they will give you consistency and require less time, which I never seem to have enough of. There is no shame in not cooking a pot of jam down for hours and hours. 

This jelly recipe is the old fashioned kind, nectarine juice and sugar are the main ingredients, and it really takes two days to make, but the results are well worth the effort. On a cold winter morning the lovely fragrance of this Nectarine Jelly will start you off with sweet dreams of summery days to come. 


NECTARINE JELLY

INGREDIENTS

3 Cups Nectarine Juice ( 9 medium Nectarines)

1/2  Cup Lemon Juice

1 package powdered fruit Pectin

1 Cup Raw Sugar

4 Cups Granulated Sugar


1 teaspoon Butter


DIRECTIONS

This will really be a two day process as first you will need to make the juice.  You are going to need a jelly bag, cheesecloth, or my favorite, a chinois for separating the juice from the fruit.


On the morning of the first day, wash and quarter your nectarines, you don't need to separate out the pits, they will add some flavor and pectin to your jelly. Then half your quarters and place everything in a large bowl, toss with the Lemon Juice and sprinkle with the Raw Sugar. Now, I use the Raw Sugar for the flavor as well as a bit of depth for the color, but if you only have granulated sugar in the pantry, you can certainly use that instead.  

Let this mixture sit for the day while you go to work, wrestle with the kids, clean the house, whatever your other responsibilities are.  If it is very hot you will probably want to let this rest in the refrigerator, if you are making this during a cooler time of year you may leave covered on the counter.


At the end of the day transfer your bowl of fruit and juices to a stainless steel saucepan, add 1 and 1/2 cups of water  and bring to a boil over high heat, stirring frequently.  Reduce the heat, cover, and simmer gently for another 20 minutes, stirring occasionally and crushing the fruit with a potato masher or the back of your ladle. Don't over cook as it reduces the strength of the natural pectin and will affect the flavor.  You just want the batch to be soft and juicy.


Transfer this mixture to your dampened jelly bag, a strainer lined with cheesecloth, or your chinois, set back over your large bowl and let the juice drip through over night. Do not squeeze the bag or press down the fruit as this will muddy your jelly.

The next day make sure your jars are cleaned and sterilized (you'll need 5 - 6 half pint jars) and your Hot Water Bath is ready to go.  To review your safe canning practices click here.

You should have 3 cups of nectarine juice. If for some reason you do not , boil a bit more water than what you need to make three cups and pour it over the fruit mixture letting it strain through to the bowl. 

Take your 3 cups of juice and put it back into the stainless steel saucepan.  Put the stove on medium heat and whisk in your box of pectin until it is completely dissolved. Add the teaspoon of butter and bring to a boil over high heat stirring constantly.  Add the 4 cups of granulated sugar all at once and return to a full roiling boil. Keep Stirring!


Once you return to that full boil keep it going for 1 minute longer, then remove from the heat. If you have any foam skim off, but the butter should help prevent this.

Pour the hot jelly into the hot jars leaving a 1/4 inch of headspace.  Wipe rims, screw on lids. Place in your Hot Water Bath, making sure your jars are completely covered with water.  Bring water bath to a boil and process for 10 minutes.  

Remove jars, cool, check your seal. Admire your handy work!

Store in a cool dark place for up to a year, if they last that long. 

ENJOY!

Tuesday, October 2, 2012

SWEET PRESERVATION: Boozy Peach Sauce


Peaches have always been one of my favorite fruits. When you bite into a fresh picked summer peach and the juice runs over your tongue, well I find it to be one of the most satisfying natural sweets under the sun.

The Sweet Preservation website is Washington State Fruit Commission’s blog dedicated to the art of preserving fruit, and really is chock full of useful information. As an official 'Canbassador' for the Commission, I was awarded a box of stone fruit for preserving.  A number of peaches were in the mix, just as I had hoped.

My mother makes a wonderfully chunky Peach Jam in the traditional fashion (meaning heavy on the sugar). As the oldest of five, when I was young, this jam was so coveted that I would try to squirrel a jar or two away, hiding it in the back of the refrigerator so I wouldn’t have to share. I must admit those selfish tendencies still exist, and once you taste this Boozy Peach Sauce you might just be hiding a jar or two so you won’t have to share either.

Even if you haven’t done much jam, jelly or sauce making this recipe is easy; sweet summer fruit simmered in sugar and booze until they melt into a sauce. If you haven’t preserved fruit before, or would simply like to review safe canning practices visit Sweet Preservations’ link, Preservation 101.

You can swap the peaches for other stone fruits – think apricots, nectarines, yes, even plums. Use bourbon or rum in place of the brandy, depending on your palette and what is in the cabinet. You can peel the peaches if you like, but if they are well washed, there is really no need, just split, pit and cube them. If you use the hot water bath, this sauce may be kept on the shelf for up to a year. Otherwise, store it in the fridge for a month more or less.

Just a splash of this lusciously sweet treat turns ordinary vanilla ice cream into a heavenly dessert. Delicious warmed and drizzled over traditional pound cake, as a sweetener for your smoothies, or a glaze for your pork roasts, chicken, or duck: like many home preserves the possibilities are endless.

Boozy Peach Sauce also makes a wonderful holiday gift, but beware, one taste will have your family and friends begging for more.


I chose Christian Brothers Brandy for my Boozy Peach Sauce, mostly because it brought back
childhood memories of visiting the now shuttered Christian Brothers Winery in New York State.


BOOZY PEACH SAUCE


INGREDIENTS

6 cups chopped pitted Peaches

2 tablespoons Lemon Juice

2 cups lightly packed Brown Sugar

1 cup Raw Sugar

3/4 cup Brandy

1 tsp grated Lemon Zest


DIRECTIONS

Prepare your boiling water canner. Sterilize jars, set lids in simmering water until ready for use. Set bands aside. 

When chopping your peaches, toss with Lemon Juice to keep from browning.

Combine Peaches, Sugars, Booze and Lemon Zest in a large stainless steel saucepan. Bring to a boil over high heat, stirring constantly, until sugar dissolves. Reduce heat and simmer gently, stirring occasionally, until thickened, about 20 minutes.


Boozy peaches cooking on the stovetop.
Lids and Hot Water Bath simmering away in the background.

Ladle hot sauce into hot jars leaving 1/4 inch headspace. Remove air bubbles and re-measure headspace. If needed, add more sauce to meet recommended headspace. Wipe rim. Center lid on jar. Apply band and adjust until fit is fingertip tight.
Process filled jars in a boiling water bath for 10 minutes, adjusting for altitude.

Remove jars and cool. Check lids for seal.

Store in dark cool pantry for a year. Makes 3 - 4 pints.

Bookmark and Share

Wednesday, September 26, 2012

SWEET PRESERVATION: Pickled Italian Plums


Bookmark and Share


Preserved and Pickled is honored to have been chosen as a Canbassador for the Washington State Fruit Commission. Well, not just honored, tickled pink actually.

What exactly is the Canbassador program, you might ask? Well, I received a box of stone fruit from Washington State which I was encouraged to preserve (like I needed encouragement), blog about my efforts, and use SweetPreservation.com as a resource.


The Sweet Preservation website is Washington State Fruit Commission’s blog dedicated to the art of preserving fruit, and really is chock full of useful information. This fun and flattering assignment certainly bore some fruitful results (pun totally intended!).

Even before my box of stone fruit arrived, I was studiously reviewing the Sweet Preservation website, as well as perusing two new canning cookbooks I had recently acquired. The first, an updated Ball Complete Book of Home Preserving, edited by Judi Kingry and Lauren Devine, discovered when I was out shopping with my mother, provided me with a Pickled Plum Recipe; the second was Jams, Jellies and Marmalades by Linda Arendt which Paul gave me as a gift; a wonderful primer or creative stimulus depending on your level of experience, for preserving, obviously, jams, jellies and marmalades.

I wasn’t exactly sure what quantities or kinds of fruit I would be receiving, all I was sure of was that it would be stone fruits from Washington State. I assumed peaches, which I was all ready to transform into a Peach Jam, one of my personal favorites, and hoped for plums as I had been wanting to try an old fashioned Pickled Plum.

Here is a Pickled Plum recipe from 1922:

Take 5 lb. ripe plums, 1 quart vinegar, 1 lb. sugar, 1 cupful of treacle, 2 oz. cloves, 3 chillies; wipe and prick the plums carefully with a fork, and place in earthenware jars.

Boil all ingredients for a quarter of an hour.

Pour the boiling liquid over the plums, and cover them at once.

Do not attempt to use them for one week, when their condition will be excellent.

Pickled Plums are traditionally served as an accomaniment to grilled pork, ham, or a cold roast beef platter.  The leftover syrup can be used as a basting sauce for spareribs or a home made barbeque sauce.

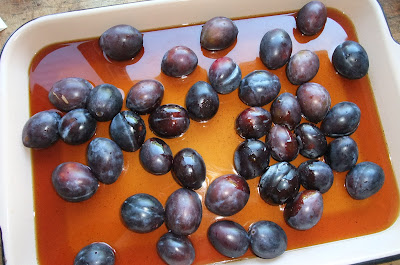
Not only did I receive fragrant peaches, and pretty little purple Italian plums, but big, bright nectarines as well. So without further adieu, I present to you the first recipe from my fabulous stone-fruit-sweet-preservation canning spree.

If you haven’t preserved fruit before, or would simply like to review safe canning practices visit Sweet Preservations’ link, Preservation 101. You can also review safe canning practices for using a Hot Water Bath here.


Peaches, Nectarines and Italian Plums from Starr Ranch Growers, Wenatchee, Washington.
To learn more about Starr Ranch Growers click here


PICKLED PLUMS


INGREDIENTS

2 1/2 to 3 lbs Italian Plums

1 1/2 inch  fresh Ginger, roughly chopped

1 hot Chilies, dried

2 whole Cloves

1 Cinnamon Stick (broken into pieces)

2 teaspoon Dried Citrus Zest (or 1 long Orange Peel)

1/2 teaspoon dried Nutmeg

3 1/2 cups lightly packed Brown Sugar

1 cups Cider Vinegar

1/2 cup Water


DIRECTIONS

Preheat oven to 275 degrees.

Tie the Ginger, Chilies, Cloves, Cinnamon Stick and Orange Zest  in a square of cheesecloth creating a spice bag.


In a non-reactive saucepan combine brown sugar, vinegar, water and nutmeg, along with the spice bag and bring to a boil over medium high heat, stirring constantly until the sugar has completely dissolved; about 10 minutes.

Wash the plums and prick each plum 6 times with a toothpick.

Place the plums in a baking dish, pour syrup over plums.  Cover tightly and place in pre-heated oven until plums are tender but still firm, 20 to 30 minutes.


Using a slotted spoon, carefully pack the plums into hot, sterilized jars.


Pour syrup over plums leaving 1/2 inch of head space. Tap jars to remove air bubbles. Wipe the off rim, seal with hot sterilized lids. 

TIP: Fill each jar with syrup a little at a time.  If short, add a bit more cider vinegar to baking dish and warm slightly over stove top. Add to jars.

Place in Hot Water Bath 15 minutes, remove and rest on counter until cool.

Check the jars are sealed; keep shelved for at least two weeks before using.

Makes 4 pints or 2 quarts.


While I do believe in buying locally whenever possible, I also realize that shopping year-round at the grocery store, where  produce may or may not be from local sources, is a fact of life for millions of people. In a global market, purchasing fruits and vegetables produced here in America could still be considered 'local' (in the 'global' scheme), and is certainly still supporting American farmers and economy.

Wednesday, August 29, 2012

OLD FASHIONED TOMATO CONSERVE


Heritage Tomatoes from Paley's Farm Market in Sharon, Connecticut.

Bookmark and Share


Summer is winding down and loads of vegetables are coming out of local gardens. Here in the northeast it is officially tomato time, and there are so many ways to preserve tomatoes! Probably because when they are in season there are so many it is hard to know what to do with them, kind of like zucchini.

This conserve is based on a vintage recipe from an older Ball Blue Book with the cinnamon and cloves thrown in as a nod to Indian jams and chutneys and for the warmth these spices bring to the citrus tone, but they are optional and this conserve is good with or without them. 

Many similar recipes can be found categorized as tomato jam or tomato butter, but they all boil down to a thick, sweet tomato spread. The lemon juice and peel add acidity needed to make the tomatoes safe for preserving in the hot water bath, as well as pectin for help with the jelling process. If you are going to proccess this recipe in a Hot Water Bath you may add one tablespoon bottled lemon juice to each pint jar before adding your tomatoes.

It is very helpful if you have a candy thermometer, and make sure you have read through the recipe and have everything prepped, sterilized, and ready to go.  Once you have made the syrup, the canning process should progress rather quickly. 

Spread this conserve on warm rolls, serve as a side with a cheese plate, or as a spread for sandwiches.


OLD FASHIONED TOMATO CONSERVE


INGREDIENTS

5 pounds firm just ripe Tomatoes

2 pounds Sugar

1 lemon, thinly sliced

1 stick Cinnamon

2 Cloves


DIRECTIONS

Blanch the tomatoes in hot water and remove the skins. Cut into quarters, cover with sugar and allow to stand overnight. 

Drain off syrup; heat to the boiling point.

Once the syrup is boiling tie cinnamon and cloves (optional) into square of muslin, cheese cloth or jelly bag, suspend in mixture, also add lemon slices, continue cooking until syrup will spin a long thread  (230 - 235 degrees on candy thermometer). 

Remove bag of spices. 

Pack tomatoes into sterilized hot canning jars and carefully add hot syrup to 1/4 inch from rim.

Seal and process in Hot Water Bath for 15 minutes, or cool and store in refrigerator.

Cool and store processed jars in dark pantry for a year.

I made 5 half pint jars with this recipe.