Tuesday, December 27, 2011

PRESERVED EGGPLANT ITALIAN STYLE


Bookmark and Share


I am moved into my new home – albeit not completely unpacked and organized, yet – the holiday season has passed, and I have slowed down on my canning and preserving, so I finally have a few moments to post some more recipes and photos from all my small batches I put by at the end of the harvest season!

I really, really like eggplant. I like it as parmigiana or as a grinder, sprinkled on an antipasto salad, on bruschetta or focaccia – or if it is Preserved Italian Style in oil, sometimes I like it straight from the jar.


A variety of eggplants and tomatoes, fresh from the garden, ready for preserving.

The problem here in the United States is that when you preserve certain vegetables in oil the U.S. Food and Drug Administration (FDA) consider it ‘risky business’. The Italians have been doing it for centuries without serious consequences, but I would not advise anyone to can or preserve something in a way that could be detrimental to their health. The recipe I am going to share with you should be refrigerated. Because the eggplant is soaked in red wine vinegar (making it ‘acidic’) before canning, the process is safe.

As a disclaimer, though, I must insist that anyone planning on canning or preserving fruits and vegetables should educate himself or herself with the processes for safe canning and preserving. A great place to start is with the National Center for Home Food Preservation’s guidelines found here.

In the meantime, if you would like to preserve Eggplant Italian Style, it is fairly simple. All you need are some sterile jars and lids and a few basic ingredients: Eggplant, Red Wine Vinegar, fresh Basil, dried Red Chilies and good Olive Oil.

Simply peel your eggplant and cut it into squares. I like mine about ½” in size. Toss these with plenty of salt, and then set them in a colander inside a large bowl to drain for a minimum of 1 to 2 hours, but it is best if you can let them rest overnight. They should shed a substantial amount of liquid.


Stone Crock, Red Wine Vinegar and Eggplants.

After the cubes have rested, press as much remaining liquid out of the eggplant as you can. Use your hands, a wooden spoon, a dessert plate – whatever works for you. Then let the eggplant rest on some paper towels and drain for another little bit.

While the eggplant cubes are resting, get yourself a stone crock that is clean and sterile (make sure you rinse thoroughly with boiling water) or similar deep container that will hold your cubed eggplant with a little headspace. Make sure you have a clean plate whose circumference is slightly smaller than your stone crock or container, and a clean jar filled with dried rice or water. The jar will be used to weigh down the plate, keeping the eggplant cubes submerged in the Red Wine Vinegar.
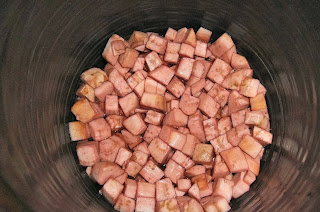
Cubed eggplant in the crock soaking in red wine vinegar.

Place the drained eggplant into your container and cover with red wine vinegar, cover with plate and rest jar on top, if necessary - then set aside for 1 to 2 hours. Pour eggplant into a colander and press off red wine vinegar.

Using a slotted spoon pack the eggplant into pint jars, layering with 2 or 3 leaves of fresh basil. Press each layer down firmly, and pour any excess vinegar out of jar. Top with one small dried red chili pepper. When each jar is full, cover the contents with your favorite olive oil leaving a ¼” of headspace. Secure the lids on the jars and refrigerate.

Let the flavors meld for at least a week, before decanting. When ready to use remove from refrigerator and allow to come to room temperature before using in your favorite recipe. Return any leftovers to the refrigerator after opening.


Preserved Eggplant Italian Style!


Thursday, December 1, 2011

PERSIMMON MARMALADE & QUINCE-APPLE SAUCE

Heart-shaped Hachiya persimmons.
photo courtesy of Pixmax


It really should not surprise me, knowing just how many different, unique and nutritional fruits are available for canning and preserving, but sometimes I am pleasantly startled by the local bounty sitting right under my nose.

Bookmark and Share

I have learned that taking the time to put aside fresh foods in season is good not only for my physical health, but for my mental health as well. I love the gathering, planning, chopping, blending, cooking, processing, not to mention the fun of recipe researching, as well as being rewarded with shelves of lovely, delicious bottles of goodies to share with my family and friends.

In that spirit, I decided to make sure I paid closer attention to local bounty, which led me to two fruits which are relatively under appreciated, but steadily regaining popularity here in the United States: the persimmon and the quince.


Though persimmons are Japan's national fruit, many Americans are unfamiliar with them. With persimmon season running from late October through December here in the northeast, now is the perfect time to try something different.

There are two types of persimmons: Fuyu and Hachiya. Fuyu persimmons are squat and dense. Their skin ranges from pale yellow-orange to brilliant reddish-orange; generally, the darker the color, the sweeter the taste. Fuyu persimmons are non-astringent, which means you can eat them either firm or soft. Firm Fuyus can be eaten like an apple, skin and all, and when you slice off the top, a beautiful star is centered in the flesh.

Heart-shaped Hachiya persimmons have a deep orange skin. Hachiyas are astringent, which means they can be eaten only when fully ripe. When a Hachiya persimmon is ripe, it should feel very soft, almost mushy. If you purchase some and they are still firm, place them in a paper bag with a banana and set on a pantry shelf for a few days.

For me the persimmon’s exotic flavor, reminiscent of apricot/mango, brings to mind warm tropical breezes. When perfectly ripe, the coral colored flesh scoops easily from its skin with a spoon, already resembles jelly.


I preserved Hachiya persimmons as a marmalade using a simple vintage recipe I discovered through Uncle Phaedrus, Consulting Detective and Founder of Lost Recipes; but there are many other fun and tasty persimmon recipes if marmalades are not your thing.

Persimmon and Granny Smith Salsa or Persimmon, Gingersnap, and Caramel Sundaes, can be found on Food Blogga. CHOW also has a fabulous recipe for Boozy Persimmon Pudding.


PERSIMMON MARMALADE

 
INGREDIENTS

2 Quarts ripe Persimmons

¾ Cup Honey

1 Cup Orange Juice

Grated rind of 1 Orange

5-7 Half Pint Jars


DIRECTIONS

Cut the tops off the persimmons; scoop out the flesh; discard seeds and cores.

Mash Persimmons and cook with Honey, Orange Juice and Orange Rind over medium heat until mixture is thick. Do not allow to boil.

Ladle into canning jars leaving 1/4  inch headspace.

Process in a Boiling Hot Water Bath for 10 minutes


The birthplace of the Quince is believed to have been the Fertile Crescent in Asia Minor, the cradle of civilization. From there it spread to the Mediterranean, delighting Greeks and Romans with its tart  flavor and potent aroma.

A bowl of quinces, or in my case a bag on the counter waiting to be preserved, perfumes the air. Once you have worked with quinces and had their fragrance lingering in your kitchen, you will forever dream of that time of year when they will once again decorate your counter and intoxicate you with their aroma.

The whitish quince flesh turns rosy when cooked, and is traditionally stewed, poached, or baked in desserts, often with other fruits. It is especially prized in the Middle East but also well-loved in South America, where it is often used in savory meat dishes. In Spain, quince becomes a dense paste to eat with cheese.

The quince was popular in Colonial America, and quinces grew at Thomas Jefferson's Monticello. Having grown up in Connecticut I was familiar with quinces, but had never had the opportunity to track some down for preserving. Luckily I have some personal ties to the Averill Orchard in Washington, Connecticut. Though they only have a few trees and do not usually sell these golden apples to the public, I was able to wrangle a peck for adding to my apple sauce.

Here in the Northeast United States, the skin of the bumpy, pear-shaped quince is rough and woolly and needs a good scrubbing before you use it in your recipes, and are not palatable to eat as you would an apple, but poached, stewed, sauced or jellied they add a sweet dimension to many a dish.

My simple recipe for Quince-Applesauce is a quick and easy way to familiarize yourself with the fruit. Besides, with Thanksgiving and Christmas holidays right around the corner, who couldn’t use a few jars of homemade sauce for the dinner table? And this applesauce with the added quince will leave everyone who tastes it begging for more.

If you want to try quince in a dinner dish, check this out:
SAFFRON INFUSED CHICKEN WITH QUINCE / Heyvali ve Zeferanli Toyuq

For more interesting facts and a few vintage recipes for quince click here.


Local Quince and Apples from Averill Orchards in Washington, Connecticut.

 
QUINCE-APPLE SAUCE

 
INGREDIENTS

1 Peck whole Quinces

1/2 Peck whole Apples

2 cups Apple Cider

1/2 cup Honey

2 Tbsp. Cinnamon

1/4 Cup Brown Sugar

6 – 8  Pint Jars


 DIRECTIONS

Wash the Quinces and Apples well, and cut into chunks. Leave in the cores and seeds, but cut out bruised portions, stems, and the blossom end of the fruits.

Place in a large pot with a lid, along with the apple cider.

Bring to simmer over medium heat, stirring occasionally to moisten all the fruit; reduce heat to low.

Leaving the lid a bit ajar, cook for a few hours, stirring occasionally, until the fruit is mushy. Be careful not to let the fruit burn on the bottom of the pot.

Remove from heat and scoop the fruit into a food mill.

Puree, and then taste. Adjust more or less until sauce is at desired sweetness with the honey and brown sugar. Add in cinnamon. Stir thoroughly.

Return to pot and bring to simmer again. You want the sauce hot when you add to the jars.


Ladle into clean canning jars, leaving 1/2 inch headspace. Use a knife to remove any air pockets.
If you have leftovers that won’t fill up a jar, keep in refrigerator for immediate treat.

Process jars in a Boiling Hot Water Bath 15 minutes.

Hot Water Bath or Pressure Canning

Tuesday, November 8, 2011

ROSE HIP JELLY


Bookmark and Share


The fruit of the Rosa Rugosa resemble tiny tomatoes, and anyone who has been near the shore – for me Cape Cod, Block Island, Maine – you find them growing wild on the shifting dunes. The sweet, distinctly scented flowers are often used to make pot-pourri, but the hips, also called haws by some, are well-known for making tea, wine, or creating a jam or jelly.

Rose hips are legendary for being high in Vitamin C, and there is no doubt in anyone’s mind about the beneficial effects of vitamin C. In addition to C, rose hips also contain A, D, Iron and E - all wrapped up in the tart-sweet taste of these miniature fruits.


The hips have seeds on the inside that are covered with tiny-weenie hairs that can be itchy and irritating. However, when making jelly the seeds will get strained out in the jelly-making process, so, it is easiest just to trim off the top and bottom of the hip. Also, when making this jelly you definitely want to use a non-reactive pan, like enamel or stainless steel. Do not use aluminum or cast iron to cook the rosehips.


 ROSE HIP JELLY


INGREDIENTS

2 quarts Rose Hips (plus or minus)

½ Cup Lemon Juice


¼ teaspoon Butter

3 Cups Raw Sugar

¼ Cup Honey

Several Crab Apples or one large Green Apple

1 package Powdered Pectin (or Homemade Pectin)

Water

5 or 6 Eight-ounce canning jars and fresh lids


DIRECTIONS

Rinse the rose hips and apples thoroughly. Cut off the tops and bottoms of the rose hips and discard. Cut apples into small pieces leaving skin and seeds.

Place rose hips and apple in a large pot. Add enough water to cover. If fruit begins to float, temporarily cover with a dinner plate or something similar for water measurement. Remove the plate before cooking.


Bring hips to a boil and stir constantly for 5 minutes before reducing heat to simmer. Cover and cook for 1 hour (more or less), until rose hips are soft. Stir occasionally so they do not stick to your pot. It is fine to mash the hips against the side of the pan as you stir. I also use a food mill to grind the pulp once it is soft, or you can use a potato masher, or just squish everything up as best you can with the back of a flat spoon.

Set up a jelly bag, or a large very fine mesh strainer, or three layers of cheesecloth over a bowl or large pot. Transfer the rose hip, apples and liquid (or puree)  into the jelly bag/strainer/cheesecloth. Let strain into the bowl for a minimum of one hour . Do not squeeze the jelly bag or cheesecloth to get more remaining juice out, it will make your jelly cloudy.


Measure the juice. You will need 3 cups of juice for this recipe, so if you have less than 3 cups, add some boiling water to the jelly bag and allow more liquid to drain through.


Place 3 cups of the rose hip juice in a large, non-reactive pot. Add the honey, lemon juice, and pectin. Bring to a boil, stirring constantly dissolving all of the pectin. Add the sugar, also stirring constantly until dissolves, then add the butter.

Bring jelly to a rolling boil (one that you cannot reduce by stirring). The mixture will bubble up considerably. Boil for exactly one minute. Then remove from heat and pour off into sterilized canning jars, leaving 1/4-inch headspace from the rim.

Make sure rims are clean and sterilized tops are finger tight on the jars, then process in a Hot Water Bath for 10 minutes. Voila, a lovely bit of summer in a jar.  Enjoy!


Hot Water Bath or Pressure Canning

Wednesday, October 19, 2011

WHAT EXACTLY IS A PICKLE?


For thousands of years, our ancestors have explored ways to pickle foods. According to Wikipedia, “pickling began 4000 years ago using cucumbers native to India.” Pickling was a way to preserve food "for out-of-season use and for long journeys, especially by sea… Although the process was invented to preserve foods, pickles are also made and eaten because people enjoy the resulting flavors.”

So, what is it that makes a pickle a pickle? Generally, pickles are foods preserved in brines, a salt and water or vinegar and water solution, with spices, created to prevent spoilage and impart particular flavors.


Bookmark and Share


There are two kinds of pickling. The first includes pickles preserved in different types of vinegar, as vinegar is acidic and most bacteria cannot survive in this type of “brine”. Most supermarket pickles are preserved in vinegar.

The other category includes pickles soaked in a salt brine to encourages fermentation, the growth of "good" bacteria making food less vulnerable to "bad" bacteria. Kimchi and many Dill or Sour pickles are fermented.


In Iran, Israel, and Arab countries, pickles are the norm and are commonly made from turnips, peppers, carrots, green olives, cucumbers, beetroot, radish, cabbage, lemons, and cauliflower.

In Mexico, chili peppers, particularly of the Jalapeño and Serrano varieties, are pickled with onions, carrots and herbs are common condiments.

In Britain, pickled onions and pickled eggs can be found in pubs and fish and chip shops. Pickled beetroot, walnuts, and gherkins, and condiments such as piccalilli, are typically eaten as an accompaniment to pork pies and cold meats, sandwiches or a ploughman's lunch, and the countries and lists of pickled products go on and on.

Nowadays, canning and pickling are enjoying a resurgence, as homemakers revolt against processed fruits and vegetables and other foods, canned with unpronounceable additives and preservatives. Modern moms and dads realize that mass processing may not be the safest or tastiest, food option for their families.
 
 
TYPES OF PICKLING


Fresh-pack pickles are cured for several hours in a vinegar solution or are immediately combined with hot vinegar, spices, and seasonings. Examples include dill pickles, bread-and-butter pickles, pickled radish and pickled beets.

Fermented pickles are vegetables soaked in a brine solution for an extended period of time. While soaking, lactic acid bacteria, naturally present on vegetables, grows while other microbes are inhibited by salt in the brine. The color of the vegetables change, and their interiors becomes translucent. Examples include kimchi, dill pickles, and sauerkraut.

Refrigerator pickles are cucumbers marinated in brine and then stored in the refrigerator. Fresh and crisp, no canning is required!

Fruit pickles are whole or sliced fruit simmered in spicy syrup. Examples include spiced peaches, pears, plums or crabapples.

Some may consider relishes a type of pickling as they are made from chopped fruits or vegetables that are cooked in a spicy vinegar solution and kept for extended periods of time, though technically a relish is a "highly flavored condiment".

A condiment is usually used in lesser amounts, like spreading mustard on a hot dog, while a relish may be eaten by the mouthful with a main food, like a chutney with meat. Examples of relishes include cucumber relish or a sweet corn relish.

Well, there you have it, a brief dissertation on what a pickle is, and hopefully the inspiration to think about  setting some time aside  to do your own canning and pickling. As noted author Eugenia Bone says, “Preserving is an extension of the values that made you shop in the farmers’ market in the first place.”

Tuesday, September 27, 2011

PICKLED RADISHES


Bookmark and Share


I had toyed with the idea of pickling radishes for a while, but when Paul and I had dinner one evening at The Community Table in Washington, Connecticut, I knew they were going on my “to pickle list.”

Community Table’s Executive Chef Joel Viehland has an extensive background having worked with numerous well-respected chefs throughout his career, including Chef Katy Sparks at Gramercy Tavern, Chez es Saada (now closed) and Quilty’s in Soho (also shuttered); with Chef Susan Spicer and Chef Donald Link at Herbsaint in New Orleans, and later spent two years at Noma, at that time a small two-star Michelin restaurant. While he was there, San Pellegrino’s Top 50 Restaurants in the World ranked the restaurant third in the world, and I believe Noma is currently ranked Number One.

Community Table’s approach to cuisine “is rooted in timeless cooking techniques and methods of preserving foods. Cooking seasonally and only with food gathered from the surrounding environment,” and like myself they believe that our triangle of Litchfield County, Connecticut; Dutchess County, New York; and Berkshire County, Massachusetts are home to some of the most amazing farms in the United States. Because the restaurant serves only seasonal and locally grown and procured food including foraged foods, their menu changes daily. To find out more about this amazing restaurant click here.

The salad I enjoyed the evening we had dinner this past spring was laced with quarters of a delicately sweet pickled spring radish. Returning home I searched through my pickling and preserving library and came up with a recipe I hope would make Joel proud. It certainly made my taste buds happy and I hope it does the same for yours.

The radishes will loose some of their color turning pinkish throughout.  You can do these as "refrigerator pickles" or run them through a hot water bath and keep them on the shelf for a longer period.  Of course, the longer you keep them in the pantry the less crispness they will have, but they will still be delicious.


I have been using more honey and less sugar over the years, but because I wanted a more intense " sweet and sour" flavor I went with raw sugar in this recipe.


PICKLED RADISHES

INGREDIENTS

3/4  cup Rice Vinegar

2 Tablespoons Raw Sugar

2 Teaspoons finely chopped Ginger

1Teaspoon Black Peppercorns

1 Teaspoon finely chopped Dill Weed (optional)

2 bunches Radish


DIRECTIONS

Wash and trim radishes; if they are smaller leave whole or cut in half.

Combine Rice Vinegar, Raw Sugar, Ginger, Peppercorns and Dill in non-reactionary saucepan over medium heat until sugar is dissolved and flavors are incorporated. Remove from heat.

If you want to refrigerate, toss radishes with dressing, pack in containers, and place in refrigerator.  Wait several days for radishes to marinade. Serve in salad or as a side dish.

If preparing for pantry, pack radishes into sterilized jars (about  2-3 pints), ladle liquid evenly between jars leaving about 1/4 inch of head space, process pint jars  in a Hot Water Bath for 10 minutes.

If you do not have enough pickling liquid simply add more vinegar to jars  Will last on shelf for up to a year.  

Refrigerate after opening.


Hot Water Bath or Pressure Canning

Tuesday, September 20, 2011

BLACK CHERRY COMPOTE


Bookmark and Share


Cherries have a very short growing season, with June being the peak season in North America. Cherries are grown in several regions of this country, but seventy percent of the cherries produced in the U.S. come from four states: Washington, Oregon, Idaho, and Utah.


Cynthia Thomson, PhD, RD, Department of Nutritional Sciences, and Chieri Kubota, PhD, Department of Plant Sciences, at the University of Arizona wrote an article on the health benefits of cherries for the National Cherry Growers & Industries Foundation.

They tell us that “Sweet cherries have several cancer-preventive components including fiber, vitamin C, carotenoids and anthocyanins.” Anthocyanins are the red pigment in berries. Fruits that are rich in anthocyanins include: blueberry, cranberry, bilberry, black raspberry, red raspberry, blackberry, black currant, Concord grape and cherries.


The article also states that cherries “are considered a good source of dietary potassium, with approximately 260 mg potassium for every cup of fresh cherries consumed (USDA MyPyramid nutrient data analysis program).” I guess bananas aren't the world's only perfect fruit.

OK, enough biology for the day, what is important is that such a delicious snack is actually good for you too. While I like to snack on whole, fresh cherries I also like to preserve them as a compote.

Compote is a dessert originating from 17th century France made of whole or pieces of fruit preserved in syrup. The fruit is gently cooked in water or spirits with sugar and spices. The compote is then served either warm or chilled arranged in a large fruit bowl or single-serve bowl compote dishes.


The Complete Book of Small-Batch Preserving by Ellie Topp and Margaret Howard is one of my favorite reference books when it comes to canning and preserving.  Their recipe for Cherry Compote calls for sugar, corn starch and a splash of kirsh. I skipped the corn starch and kirsh and went with red wine and honey, which leaves my version a little tarter and runnier, but I like it that way.  It is still delicious over pound cake, ice cream, or even cooked down for serving with duck or goose.


I used black cherries in this batch but any sweet or sour cherry will do, and of course a cherry pitter makes the whole process go more quickly. Lemon juice adds a bit of acidity, as well as flavor, and allows for finishing in a hot water bath. As always use clean sterile jars, and for this recipe make sure to leave 1/2 inch of headspace before processing.


BLACK CHERRY COMPOTE


INGREDIENTS


Cup + 2 Tablespoons Dry Red Wine

1/4 Cup Honey (more or less to taste)

2 teaspoons Lemon Juice

4 Cups fresh pitted Cherries cut in half


DIRECTIONS

Place Wine, Honey and Lemon Juice in a medium saucepan.  Bring to a boil over medium heat, stirring to allow ingredients to blend. Gently boil for several minutes allowing juice to reduce slightly.  Boil for another fifteen minutes stirring occasionally.

At this point, if you decide you'd like your syrup a bit thicker, stir together 1 Tablespoon of Cornstarch and 1 Tablespoon of water; stir into syrup. Gently boil for another minute while syrup thickens. Remove from heat.

Remove hot, sterile jars from dishwasher or canner. Pack cherries into jars ( I usually end up with about two pints).  Pour syrup over cherries.  

Process 25 minutes for 1/2 pint jars or 40 minutes for pint jars. Store in pantry for up to one year.  Refrigerate after opening.


Hot Water Bath or Pressure Canning

Wednesday, September 7, 2011

SNEAK PEEK OF UPCOMING EVENTS...

The summer is flying by and I have been so busy that I haven't had time to post anything for about a month. It certainly doesn't look like my schedule is going to slow down anytime soon.  In the meanwhile, here are some photos of what's been happening in the kitchen.


Bookmark and Share

Hand Chopper I inherited from my grandmother and my favorite wooden bowl.


Preparing for Pickled Radishes
 
Fresh Garlic Scapes

Lovely Eggplants for Preserving in Oil.

Cardamom, Star Anise and Cinnamon for the Jams and Jellies.

My new Chinois Set and Stone Crock for Jellies and Pickles.


Black Cherries for Black Cherry Compote.


Coming Soon - more recipes and photos.

Tuesday, August 9, 2011

EASY REFRIGERATOR PICKLES


Cucumbers are like zucchini, once they start to grow in the garden there are so many it is hard to know what to do with them all.  I make a Hot Crock Pickle that has a nice bite, but it takes a week to cure and pack them up.  Then, of course, there are Dill Pickles, Bread and Butter Pickles, Curry Pickles; besides pickles there are seemingly hundreds of cucumber salads and relishes that you can make – the variations are endless.


Bookmark and Share


If you have a few extra cucumbers and some onions and you want to make a quick pickle that doesn’t need any processing – just sterile jars and space in the refrigerator – this one is a winner. The recipe combines sugar and vinegar that create a tangy, tart flavor, basically a simple Bread and Butter variety.  Give it a try.  I don’t think they will take up space in your refrigerator for too long!


EASY REFRIGERATOR PICKLES

INGREDIENTS

Enough sliced cucumbers to fill up a gallon jar
3 White Onions sliced thin
1 – 2 cups Raw Sugar (depending on your taste)
4 cups Cider Vinegar
1/3 cup Kosher Salt
2 tsp. Mustard Seeds
1 tsp. each Turmeric and White Pepper

DIRECTIONS

Combine sugar and vinegar in small, non-reactive saucepan over low heat. Once sugar is dissolved add spices. Simmer gently, do not boil, for several minutes to meld flavors.

Pack sliced cucumbers and onions tightly into jar; if you do not have a gallon container feel free to use several quart jars. Pour pickling liquid and spices into container leaving 1 to 2 inches (so you can stuff in more cukes!) of head-space. Cap jars.  Reserve any leftover liquid. Let jar(s) sit at room temperature.

Most likely you will discover you have not packed jars fully and the cucumbers and onions will rise leaving more space. Add more of the vegetables to fill, top off with reserved pickling juice and place in refrigerator. I usually hide them in the back and let them rest a few days so the vegetables have time to absorb the pickling flavor. Open and enjoy!


Thursday, August 4, 2011

SWEET CORN RELISH


‘Tis the season for Sweet Corn, and when the corn comes in there is a lot of it. Unfortunately, it does not last forever, and not only because we all cannot get enough of that flavorful snap from corn-on-the-cob, but because the season is short and sweet like our New England summers. Luckily you can enjoy this taste of summer all year long by canning some good, old-fashioned Corn Relish like grandma used to make.

Bookmark and Share


OK, my gramma did not make corn relish, and neither did my mom. They did, however, make the best Bread and Butter pickles you have ever tasted, even the brine is delicious. If you are a serious pickle lover, like me, you'll just drink that pickle juice right out of the jar. I haven't shared the recipe for my families Bread and Butter Pickles, some recipes must be kept secret; but, my Easy Refrigerator Pickle recipe is close.

Anyway, back to the Corn Relish, making and canning your own is easy. You can do it with basic equipment you probably all ready have in your kitchen. Blanching the corn and stripping the cob of it's kernels can be a bit tedious, but once you get a flow going its not too awful. Beyond that there seem to be hundreds of variations on recipes for corn relish, so it is easy to come up with one that will suit your individual taste. One thing all the recipes do have in common though is vinegar.

 Thanks to the vinegar in the relish you can finish the jars in a Boiling Water Bath - Pressure Canning not required. Alternatively you can skip the water bath and store the jarred relish right in the refrigerator.  I usually put one or two jars in the fridge for immediate snacking, but the rest get processed and stored on the shelf. I just don't have enough room in the fridge for all those jars!


SWEET CORN RELISH


INGREDIENTS


1 Tbs. Olive Oil

3 3/4 cups diced Red Bell Peppers (3 or 4 peppers)

1 Tbs. Kosher Salt

4 cups fresh Corn kernels

1 3/4 cups diced White Onion or just 1 very large onion

1 1/2 cups Apple Cider Vinegar

1 1/2 cups Raw Sugar

1/2 tsp. dry Mustard

1/2 tsp. ground Turmeric

3 to 5 One Pint Jars


DIRECTIONS

Start with fresh corn on the cob - as fresh as you can get. If there is a delay between harvesting and canning, place corn in the refrigerator or pack it in ice. The sugars break down quickly at room temperature.

Make sure you have sterile jars and lids ready. Whenever I can, I run my jars through the dishwasher while preparing my fruits and vegetables. This not only sterilizes them but keeps them hot until I am ready to pack my food. Otherwise, immerse the jars in boiling water for 10 minutes before filling them. Place the lids and rims in a small pot of almost-but-not-quite boiling water for at least 5 minutes, and use the magnetic "lid lifter wand" to remove them out when you are ready.

Husk the corn and use a soft vegetable brush or a soft washcloth to remove as much silk as possible; just be gentle.

Cut kernels from cob about 2/3 to 3/4 the depth of the kernels. If you do not have a corn-cutting tool, cut the stem end, stand on your cutting board, hold the ear by the small end, and slide the blade carefully down the ear.


In a large pan over medium-high heat, warm the oil. Add the bell peppers, salt, and sauté, stirring until the peppers soften and begin to caramelize, about 12 minutes. Add the corn, stirring to combine, and cook the vegetables until the corn is hot, just 3 or 4 minutes longer.  Turn off the heat and add the onion to the pan; stir well.

If you are going to Hot Water Process your filled jars, you may want to not cook the corn in the pan at all, as it will cook during the sealing process.

In a small non-reactive saucepan, combine the vinegar, sugar and turmeric over medium heat and stir just until the sugar dissolves, about 2 minutes. Do not boil.

Ladle the corn mixture into the clean 1-pint jars, and pour the warm brine over to cover completely but leave 1/2 inch head-space.

Process the jars 10-15 minutes in a Boiling Water Bath. Otherwise, cover tightly, and let the relish sit in a cool, dark corner of the kitchen, so the flavors can marry, for 1 day before storing in the refrigerator.

Refrigerated or Canned, this Corn Relish will keep for up to 1 year, just make sure the kernels do not rise above the liquid (add a splash of water if necessary).

Not quite sure what to do with all the Corn Relish you just made?  Click here.

Hot Water Bath or Pressure Canning ?