Showing posts with label pickles. Show all posts

Thursday, January 3, 2013

PICKLED ONIONS


Bookmark and Share


In England, pickled onions are enjoyed regularly. They are eaten with fish and chips, as part of a Ploughman's Lunch, with meat pies, and so many other savory dishes. There are hundreds of commercial varieties available, both across the pond and here in the States, but nothing beats a jar of homemade pickled onions.

Tiny pickling or button onions are readily available beginning in the autumn and well into the winter. Small white boiling onions, cippoline onions, shallots and even a few sliced yellow or white onions can be pickled separately or all together. You can also use a variety of vinegars, although it seems malt is the traditional choice for the Brits.

Overall this recipe is fairly quick and easy with results that are crunchy and delicious.  Once you try pickled onions you will always want to keep one or two jars on the pantry shelf so you may readily add that little 'something special' to your lunches and brunches.


PICKLED ONIONS

INGREDIENTS

2 pounds small White Onions, peeled (see note below)

4 teaspoon Basic Pickling Spices plus 4 dried red chili peppers

1 Tablespoon Kosher Salt

1 1/2 cups Malt Vinegar

½ Distilled White Vingar

1 Cup Water

3/4 cup  Sugar


TIP: Peeling pickling onions is time-consuming. To speed up the process top and tail the onions,  place them in a large bowl, and pour enough boiling water over to cover. Leave until cool enough to handle and the skins will just slide off. Do not leave your onions in the water once they have cooled or they will start to go mushy.


DIRECTIONS

Place the spices (except the red chili peppers) into a bit of cheesecloth and tie tightly, put the 4 chili peppers into a mini processor, and pulse until they are in small bits. 

In a large stainless steel pan mix vinegars, water, and sugar. Heat to dissolve the sugar but do not boil. Let the pot simmer for a good 20 to 30 minutes to make sure sugar is dissolved.

Add the spice bag and chili peppers, simmer for another 20  minutes. 

Pack the peeled onions into clean, sterilized pint jars. Pour over the vinegar and spice liquid (after removing your pickling spice bag) filling the jar to 1/4 inch from the rim.  Check to be sure there are no air pockets. Seal the jars and process in a Hot Water Bath for 10 minutes, or allow to cool and store in refrigerator.

The onions will be ready to eat after about one month but are more flavorful if rested for two before opening. Once you've popped the top it is best to keep them in a refrigerator or cool pantry.

Wednesday, September 26, 2012

SWEET PRESERVATION: Pickled Italian Plums


Bookmark and Share


Preserved and Pickled is honored to have been chosen as a Canbassador for the Washington State Fruit Commission. Well, not just honored, tickled pink actually.

What exactly is the Canbassador program, you might ask? Well, I received a box of stone fruit from Washington State which I was encouraged to preserve (like I needed encouragement), blog about my efforts, and use SweetPreservation.com as a resource.


The Sweet Preservation website is Washington State Fruit Commission’s blog dedicated to the art of preserving fruit, and really is chock full of useful information. This fun and flattering assignment certainly bore some fruitful results (pun totally intended!).

Even before my box of stone fruit arrived, I was studiously reviewing the Sweet Preservation website, as well as perusing two new canning cookbooks I had recently acquired. The first, an updated Ball Complete Book of Home Preserving, edited by Judi Kingry and Lauren Devine, discovered when I was out shopping with my mother, provided me with a Pickled Plum Recipe; the second was Jams, Jellies and Marmalades by Linda Arendt which Paul gave me as a gift; a wonderful primer or creative stimulus depending on your level of experience, for preserving, obviously, jams, jellies and marmalades.

I wasn’t exactly sure what quantities or kinds of fruit I would be receiving, all I was sure of was that it would be stone fruits from Washington State. I assumed peaches, which I was all ready to transform into a Peach Jam, one of my personal favorites, and hoped for plums as I had been wanting to try an old fashioned Pickled Plum.

Here is a Pickled Plum recipe from 1922:

Take 5 lb. ripe plums, 1 quart vinegar, 1 lb. sugar, 1 cupful of treacle, 2 oz. cloves, 3 chillies; wipe and prick the plums carefully with a fork, and place in earthenware jars.

Boil all ingredients for a quarter of an hour.

Pour the boiling liquid over the plums, and cover them at once.

Do not attempt to use them for one week, when their condition will be excellent.

Pickled Plums are traditionally served as an accomaniment to grilled pork, ham, or a cold roast beef platter.  The leftover syrup can be used as a basting sauce for spareribs or a home made barbeque sauce.

Not only did I receive fragrant peaches, and pretty little purple Italian plums, but big, bright nectarines as well. So without further adieu, I present to you the first recipe from my fabulous stone-fruit-sweet-preservation canning spree.

If you haven’t preserved fruit before, or would simply like to review safe canning practices visit Sweet Preservations’ link, Preservation 101. You can also review safe canning practices for using a Hot Water Bath here.


Peaches, Nectarines and Italian Plums from Starr Ranch Growers, Wenatchee, Washington.
To learn more about Starr Ranch Growers click here


PICKLED PLUMS


INGREDIENTS

2 1/2 to 3 lbs Italian Plums

1 1/2 inch  fresh Ginger, roughly chopped

1 hot Chilies, dried

2 whole Cloves

1 Cinnamon Stick (broken into pieces)

2 teaspoon Dried Citrus Zest (or 1 long Orange Peel)

1/2 teaspoon dried Nutmeg

3 1/2 cups lightly packed Brown Sugar

1 cups Cider Vinegar

1/2 cup Water


DIRECTIONS

Preheat oven to 275 degrees.

Tie the Ginger, Chilies, Cloves, Cinnamon Stick and Orange Zest  in a square of cheesecloth creating a spice bag.


In a non-reactive saucepan combine brown sugar, vinegar, water and nutmeg, along with the spice bag and bring to a boil over medium high heat, stirring constantly until the sugar has completely dissolved; about 10 minutes.

Wash the plums and prick each plum 6 times with a toothpick.

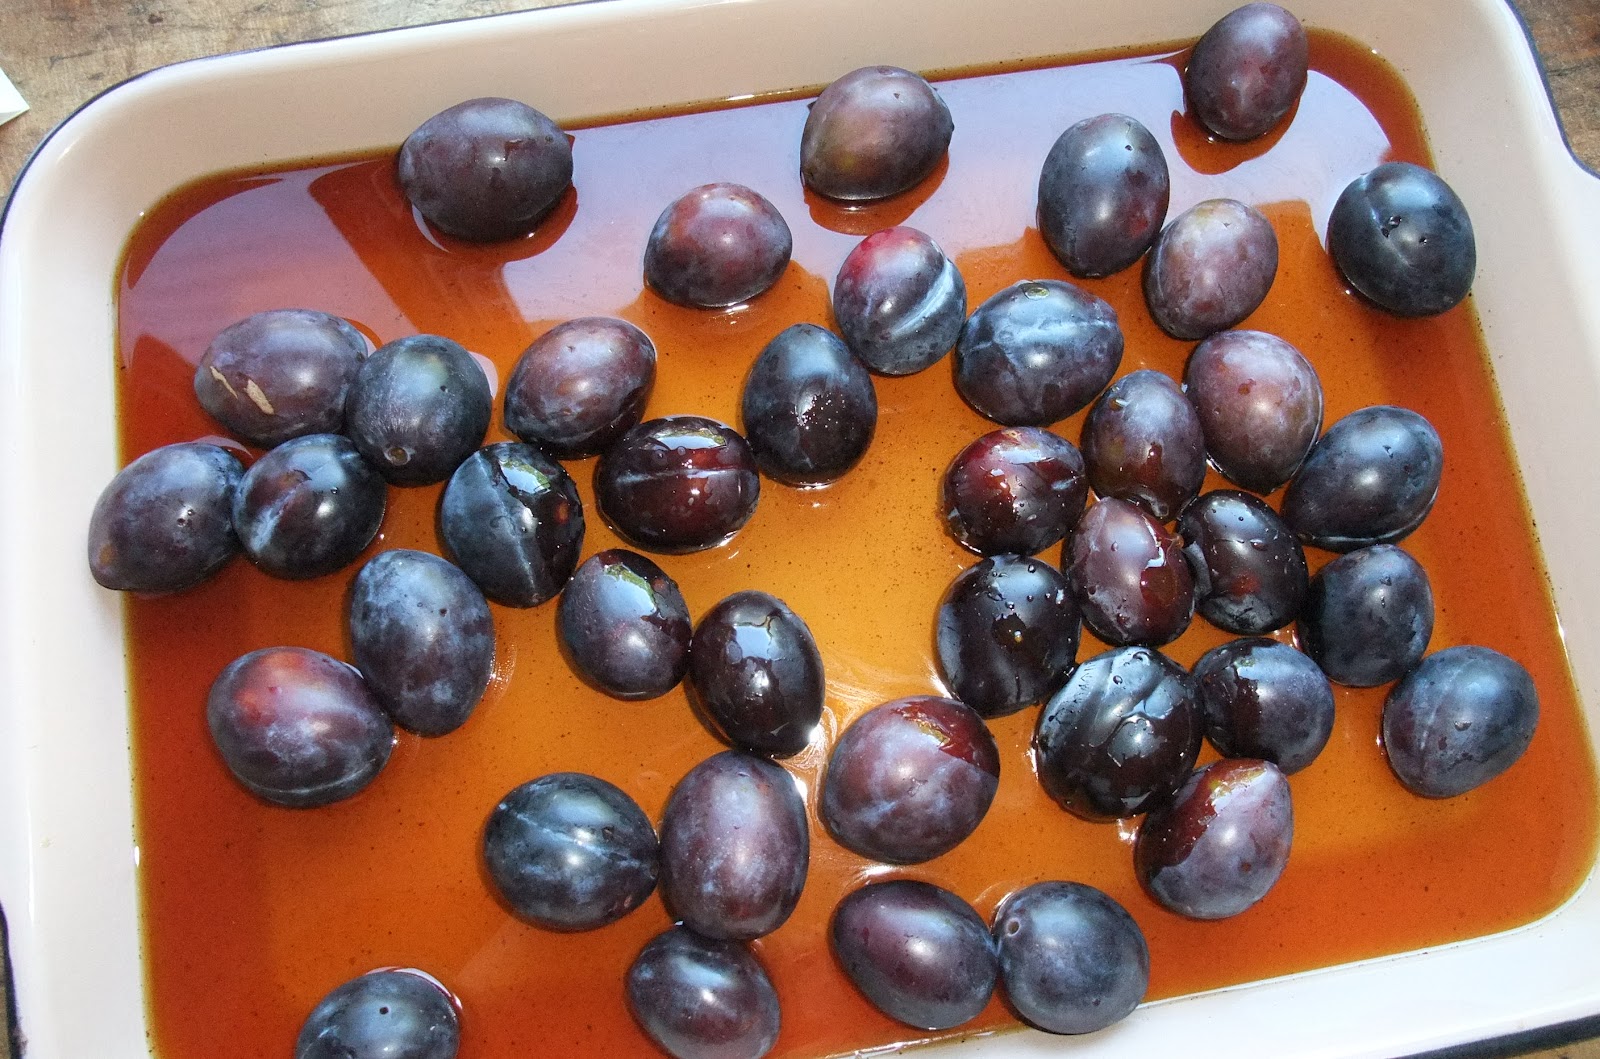
Place the plums in a baking dish, pour syrup over plums.  Cover tightly and place in pre-heated oven until plums are tender but still firm, 20 to 30 minutes.


Using a slotted spoon, carefully pack the plums into hot, sterilized jars.


Pour syrup over plums leaving 1/2 inch of head space. Tap jars to remove air bubbles. Wipe the off rim, seal with hot sterilized lids. 

TIP: Fill each jar with syrup a little at a time.  If short, add a bit more cider vinegar to baking dish and warm slightly over stove top. Add to jars.

Place in Hot Water Bath 15 minutes, remove and rest on counter until cool.

Check the jars are sealed; keep shelved for at least two weeks before using.

Makes 4 pints or 2 quarts.


While I do believe in buying locally whenever possible, I also realize that shopping year-round at the grocery store, where  produce may or may not be from local sources, is a fact of life for millions of people. In a global market, purchasing fruits and vegetables produced here in America could still be considered 'local' (in the 'global' scheme), and is certainly still supporting American farmers and economy.

Saturday, January 7, 2012

PICKLED PEPPERS IN OIL


Bookmark and Share


Several years ago, I developed a pickled pepper recipe for a friend. Daryl had given me some seeds from a pepper he had wrapped up in tin foil. He had been to a restaurant for dinner and complimented the chef on the meal, particularly the peppers. Well, the peppers were imported from Italy and the chef had given Daryl an actual dried pepper (hence, the tin foil wrapping).

Knowing that I like to grow things and being excited at the prospect of harvesting bunches of these delicious peppers, he passed the seeds onto me. We had one good season. Disappointingly, the second and third years (generations) never produced enough peppers for pickling; possibly, they were a hybrid. Anyway, I have a few seeds left from the last lonely pepper - one a third generation plant produced - and I am going to try planting one more time. Though a bit disappointing in the pepper production arena, the whole experience did lead to a wonderful recipe for preserving peppers.

I wanted to do Italian style preservation in what I assumed would be just olive oil, but every recipe I found was more towards pickling. I queried all my foodie friends and relatives, searching high and low for recipes on preserving peppers. Finally, I modified one recipe from many. 

You can use any kind of pepper in this recipe: sweet, hot, or a combination of both.  We certainly continue to enjoy peppers bottled this way and hope you will too.

NOTE: If using any hot peppers, please make sure to wear some kind of glove while cutting or stemming. Do not rub face or eyes - even if you get a sudden, uncontrollable itch!


PICKLED PEPPERS IN OIL


INGREDIENTS

4 pounds Peppers

1/4 Cup Raw Sugar

1/2 Cup Water

1 Cup Oil

2 Cups White Vinegar

2 cloves Garlic

1/2 Tablespoon prepared Horseradish


DIRECTIONS

Wash Peppers.  You may stem and pack them whole or slice them into circles, depending on your preference and size of canning jars. Do not worry about removing seeds.

In a stainless steel pot, combine all ingredients. Simmer for 15 minutes.  Do not boil.

Using a slotted spoon, pack Peppers into sterilized jars.

Bring remaining pickling juice to a roiling boil.  Remove from heat. Using ladle, evenly divide liquid between jars of peppers.  You may place garlic cloves into two jars or discard, as desired.

Jars need to be filled leaving only 1/4 inch headspace.  If you do not have enough picklingjuice, top off containers with olive oil.

Clean rims.  Adjust caps.

Process in a Boiling Hot Water Bath: 10 minutes for half pints or pints, 15 minutes for quarts.

Makes about 8 half pints. Stores on shelf, unopened, for 1 year.

Refrigerate after opening.

Wednesday, October 19, 2011

WHAT EXACTLY IS A PICKLE?


For thousands of years, our ancestors have explored ways to pickle foods. According to Wikipedia, “pickling began 4000 years ago using cucumbers native to India.” Pickling was a way to preserve food "for out-of-season use and for long journeys, especially by sea… Although the process was invented to preserve foods, pickles are also made and eaten because people enjoy the resulting flavors.”

So, what is it that makes a pickle a pickle? Generally, pickles are foods preserved in brines, a salt and water or vinegar and water solution, with spices, created to prevent spoilage and impart particular flavors.


Bookmark and Share


There are two kinds of pickling. The first includes pickles preserved in different types of vinegar, as vinegar is acidic and most bacteria cannot survive in this type of “brine”. Most supermarket pickles are preserved in vinegar.

The other category includes pickles soaked in a salt brine to encourages fermentation, the growth of "good" bacteria making food less vulnerable to "bad" bacteria. Kimchi and many Dill or Sour pickles are fermented.


In Iran, Israel, and Arab countries, pickles are the norm and are commonly made from turnips, peppers, carrots, green olives, cucumbers, beetroot, radish, cabbage, lemons, and cauliflower.

In Mexico, chili peppers, particularly of the Jalapeño and Serrano varieties, are pickled with onions, carrots and herbs are common condiments.

In Britain, pickled onions and pickled eggs can be found in pubs and fish and chip shops. Pickled beetroot, walnuts, and gherkins, and condiments such as piccalilli, are typically eaten as an accompaniment to pork pies and cold meats, sandwiches or a ploughman's lunch, and the countries and lists of pickled products go on and on.

Nowadays, canning and pickling are enjoying a resurgence, as homemakers revolt against processed fruits and vegetables and other foods, canned with unpronounceable additives and preservatives. Modern moms and dads realize that mass processing may not be the safest or tastiest, food option for their families.
 
 
TYPES OF PICKLING


Fresh-pack pickles are cured for several hours in a vinegar solution or are immediately combined with hot vinegar, spices, and seasonings. Examples include dill pickles, bread-and-butter pickles, pickled radish and pickled beets.

Fermented pickles are vegetables soaked in a brine solution for an extended period of time. While soaking, lactic acid bacteria, naturally present on vegetables, grows while other microbes are inhibited by salt in the brine. The color of the vegetables change, and their interiors becomes translucent. Examples include kimchi, dill pickles, and sauerkraut.

Refrigerator pickles are cucumbers marinated in brine and then stored in the refrigerator. Fresh and crisp, no canning is required!

Fruit pickles are whole or sliced fruit simmered in spicy syrup. Examples include spiced peaches, pears, plums or crabapples.

Some may consider relishes a type of pickling as they are made from chopped fruits or vegetables that are cooked in a spicy vinegar solution and kept for extended periods of time, though technically a relish is a "highly flavored condiment".

A condiment is usually used in lesser amounts, like spreading mustard on a hot dog, while a relish may be eaten by the mouthful with a main food, like a chutney with meat. Examples of relishes include cucumber relish or a sweet corn relish.

Well, there you have it, a brief dissertation on what a pickle is, and hopefully the inspiration to think about  setting some time aside  to do your own canning and pickling. As noted author Eugenia Bone says, “Preserving is an extension of the values that made you shop in the farmers’ market in the first place.”

Tuesday, August 9, 2011

EASY REFRIGERATOR PICKLES


Cucumbers are like zucchini, once they start to grow in the garden there are so many it is hard to know what to do with them all.  I make a Hot Crock Pickle that has a nice bite, but it takes a week to cure and pack them up.  Then, of course, there are Dill Pickles, Bread and Butter Pickles, Curry Pickles; besides pickles there are seemingly hundreds of cucumber salads and relishes that you can make – the variations are endless.


Bookmark and Share


If you have a few extra cucumbers and some onions and you want to make a quick pickle that doesn’t need any processing – just sterile jars and space in the refrigerator – this one is a winner. The recipe combines sugar and vinegar that create a tangy, tart flavor, basically a simple Bread and Butter variety.  Give it a try.  I don’t think they will take up space in your refrigerator for too long!


EASY REFRIGERATOR PICKLES

INGREDIENTS

Enough sliced cucumbers to fill up a gallon jar
3 White Onions sliced thin
1 – 2 cups Raw Sugar (depending on your taste)
4 cups Cider Vinegar
1/3 cup Kosher Salt
2 tsp. Mustard Seeds
1 tsp. each Turmeric and White Pepper

DIRECTIONS

Combine sugar and vinegar in small, non-reactive saucepan over low heat. Once sugar is dissolved add spices. Simmer gently, do not boil, for several minutes to meld flavors.

Pack sliced cucumbers and onions tightly into jar; if you do not have a gallon container feel free to use several quart jars. Pour pickling liquid and spices into container leaving 1 to 2 inches (so you can stuff in more cukes!) of head-space. Cap jars.  Reserve any leftover liquid. Let jar(s) sit at room temperature.

Most likely you will discover you have not packed jars fully and the cucumbers and onions will rise leaving more space. Add more of the vegetables to fill, top off with reserved pickling juice and place in refrigerator. I usually hide them in the back and let them rest a few days so the vegetables have time to absorb the pickling flavor. Open and enjoy!


Thursday, July 28, 2011

BLUEBERRY PICKLES

Bookmark and Share

This recipe is from The White House Cookbook, The Whole Comprising a Comprehensive Cyclopedia of Information for the Home. Published in 1887, the authors are Mrs. F.L. Gillette and Hugo Ziemann, Steward of the White House. I wonder if this was one of Grover Cleveland’s favorites?


Instructions


For blueberry pickles, old jars which have lost their covers, or whose edges have been broken so that the covers will not fit tightly, serve an excellent purpose as these pickles must not be kept air-tight.

Pick over your berries, using only sound ones; fill your jars or wide-mouthed bottles to within an inch of the top, then pour in molasses enough to settle down into all the spaces; this cannot be done in a moment, as molasses does not run very freely. Only lazy people will feel obliged to stand by and watch its progress. As it settles, pour in more until the berries are covered. Then tie over the top a piece of cotton cloth to keep the flies and other insects out and set away in the preserve closet. Cheap molasses is good enough, and your pickles will soon be "sharp." Wild grapes may be pickled in the same manner.

Monday, May 16, 2011

PICKLED RHUBARB


Bookmark and Share
 

A spring treasure, rhubarb, the season’s first, and in my case favorite “fruit”, is delicious and good for you. It can be enjoyed throughout the summer, but as far as I am concerned springtime is the best time for rhubarb.

Botanically, rhubarb is a vegetable. A close relative of garden sorrel, rhubarb’s long red stalks are crisp when raw, but cook down into a mush that is perfect for preserves, relishes, chutneys, sauces, and yes, pies.

Rhubarb is often found in recipes that interplay sweet and sour. Affectionately known as the “pie plant”, its classic pairing is with strawberries, as in Strawberry-Rhubarb Pie, but there are so many other culinary possibilities to explore, like pickled rhubarb or rhubarb chutney.

Alice Waters, who likens the tart-flavored veggie to “the smell of earth in spring,” is a fan. Known for its diuretic and anti-inflammatory properties, rhubarb has long been used in natural medicine. Also worth noting, rhubarb is low in calories and high in calcium (almost a third of your recommended daily amount) and potassium, plus minerals, fiber, folate, with plenty of vitamins and iron too, just don't eat the leaves, they are poisonous.


SPICY PICKLED RHUBARB


INGREDIENTS

1 pound trimmed Rhubarb

2 Cups Apple Cider Vinegar

1/2 Cup Honey

1/2-inch piece Ginger, peeled and thinly sliced

1 Tablespoon Kosher Salt

2 dried Chili Peppers

1 teaspoon whole Cloves

4 Whole Allspice

 
DIRECTIONS

Boil vinegar, honey, salt, ginger and spices until honey and salt dissolve completely(approximately 5 minutes after coming to a slow boil).

Cut rhubarb into batons long enough to fill each jar. For half-pint jars or smaller, slice rhubarb into half-inch pieces.

Pack Rhubarb into sterilized jars distributing the spices as evenly as possible.

Pour pickling brine over fruit, screw on lids, and allow to cool.

Refrigerate for six months or more.

Note: This pickle is best refrigerated, though it can go through a canning process, (Hot Water Bath for 10 minutes) which will soften the fruit to mush, but is delicious on top of a baked brie, or rolled into a pork tenderloin, stuffed into pork chops, blended with cream cheese, perfect for tossing on summer salads - the possibilites are endless.


SWEET RHUBARB PICKLE


INGREDIENTS

2 pounds Rhubarb, trimmed and peeled

2 cups Raw Sugar

1 3/4 cups Cider Vinegar

1 teaspoon Ground Ginger

4 teaspoon Yellow Mustard Seeds (optional)

6 Cloves

1 Cinnamon Stick or 1/4 teaspoon Ground Cinnamon

Zest and Juice of 1 Orange


DIRECTIONS

Cut the Rhubarb into 1 and 2 inch pieces. Do not peel.

Over medium heat dissolve the sugar in the vinegar; add the zest and juice of the orange, and  the ginger, mustard seeds, cloves, and cinnamon.

Bring to a slow boil. Simmer carefully for 10 minutes.

Place Rhubarb (same as recipe above) carefully in sterilized jars. Reduce the liquid by boiling until syrupy.

Pour the syrup into sterilized jars to ¼ inch and seal.

Then either let cool and place in refrigerator for use up to 6 months OR cure in boiling hot water bath for 15 minutes and keep on pantry shelf for up to one year.


RHUBARB CHUTNEY

I found this recipe in an older issue of New Zealand Woman’s Weekly. They called this a pickle, but it seems a bit more chutney-like to me, so my version is called Rhubarb Chutney. I did the conversions for you. This one I am finishing in a hot water bath and putting on the pantry shelf for gifts. Of course, the article noted that this recipe goes quite well with spring lamb.


INGREDIENTS

2 pounds Rhubarb

1 pound Videlia Onions

2 tablespoons Kosher Salt

2-1/2cups White Vinegar

2 cups Brown Sugar

1 tablespoon Curry Powder

1 tablespoon Dry Mustard Powder

1/2 teaspoon Ground White Pepper

1/2 Cup Raisins or Dried Cranberries

plus 2 Tablespoons Cornflour

2 Tablespoons White Vinegar


DIRECTIONS

Wash rhubarb. Trim ends, removing any leaves. Cut into 2 inch pieces. Place in a non-metallic bowl. Peel onions and chop roughly. Place onions in a second non-metallic bowl. Sprinkle salt over rhubarb and onion. Cover both with warm water and leave for six hours or overnight.

Bring undrained onion mixture to the boil in a large saucepan. Add raisins (or cranberries), rinse and drain Rhubarb and add to onion mixture with vinegar. Cook until rhubarb is soft.

Stir in sugar, curry powder, mustard and pepper. Return to the boil.

In small bowl whisk cornflour and second measure of vinegar to form a paste. Stir slowly into hot Rhubarb mixture and let boil gently until thick.

Spoon into hot, clean jars and seal. Cure in Hot Water Bath for 15 minutes. Keep in pantry for up to one year.

Makes 6 cups

You may choose to preserve food at home to save money, to have greater control over what you consume, or just for the joy of it. Regardless of the reasons, it is important to do it safely. Using the proper equipment, as well as following recommended guidelines and recipes can ensure that the food you preserve at home is safe and delicious.


Safe Canning Guidelines

Saturday, March 5, 2011

PICKLED CARROTS MEXICAN-STYLE

Any time is a good time to pickle carrots and young fresh baby carrots add an interesting twist to this recipe, but my premiere experience pickling carrots was born of necessity.

Bookmark and Share

On what was arguably one of the coldest nights of the year, my refrigerator decided to stop working. I guess that was good in a way, because the food that hadn’t already defrosted went out in coolers on the porch. Unfortunately, the repairman said that it could be several weeks until he got the part he needed. After clearing out the refrigerator shelves and carefully stowing the coolers on the back porch, I was left with some eggs and a handful of carrots. 
 
They both got pickled. Eggs I have done - regularly (check out my recipe), but pickling carrots was a new idea to me. I did not have enough carrots to justify pulling out the pressure canner and I wasn't in the mood for a Morrocan Salad.

A search through the kitchen cabinets, a look through my pickling and preserving cookbooks, and I realized I had everything I needed for a variation of pickled carrots. Pickled carrots are served at good Mexican restaurants, traditionally placed on the table with the chips and salsa when you sit down. Celery and jalepenos are the usual canning partners for this recipe, but not completely necessary.

My family likes things spicy and since I did not have the traditional jalapeno peppers, I replaced them with some dried red chilies. I also omitted the celery as I had none, and so was born my  'Americanized' version of Mexican Pickled Carrots.

They are tasty as a side dish, add an interesting twist to a Five Bean Salad (and I don't always use the same five beans - makes it so much more interesting), or an Antipasto Salad. I have been contemplating chopping them up and adding them to a Tuna Salad or maybe a Banh Mi  type sandwich.  Oh my, the possibilities are endless!


MEXICAN-STYLE PICKLED CARROTS

INGREDIENTS

6 to 10 Carrots, skin removed, sliced 1/2 inch thick

2  dried Chili Peppers, stem removed, sliced 1/2 long
(or 1 small fresh Jalepeno sliced)

1 tsp whole Black Peppercorns

1 tsp Salt (scant)

1 cup White Vinegar

1/2 cup of Water

4 Bay Leaves

2 Tbsp Olive Oil

1 Quart Canning Jar

DIRECTIONS

Begin by gathering and preparing all of your ingredients as this canning process moves fairly quickly. Do not forget to wear some kind of rubber gloves while cutting up the chilies. 

Put the oil in a heavy bottomed pot with the bay leaves and cook over medium heat for about a minute to infuse the oil with bay flavor – do not burn, they should be fragrant and maybe slightly toasty.

Add the pepper, stir for 30 - 45 seconds.

Add carrots, salt, and water (enough to cover) and bring to a boil. Simmer rapidly until not quite tender (about 5 minutes).

Add peppercorns, vinegar and more water if needed to cover. Stir to mix, return to a boil. Immediately remove from heat.

Carefully transfer carrots and spices (as many peppercorns as you can) while hot into sterilized jar.  Add liquid to 1/4 inch from lip, don't worry if there is a little left over.

Cap. Process in a hot water bath for 20 minutes.

Remove jar, let cool, overnight making sure seal is completed. 

Store in pantry. When serving remove the bay leaves.