Wednesday, September 26, 2012

SWEET PRESERVATION: Pickled Italian Plums


Bookmark and Share


Preserved and Pickled is honored to have been chosen as a Canbassador for the Washington State Fruit Commission. Well, not just honored, tickled pink actually.

What exactly is the Canbassador program, you might ask? Well, I received a box of stone fruit from Washington State which I was encouraged to preserve (like I needed encouragement), blog about my efforts, and use SweetPreservation.com as a resource.


The Sweet Preservation website is Washington State Fruit Commission’s blog dedicated to the art of preserving fruit, and really is chock full of useful information. This fun and flattering assignment certainly bore some fruitful results (pun totally intended!).

Even before my box of stone fruit arrived, I was studiously reviewing the Sweet Preservation website, as well as perusing two new canning cookbooks I had recently acquired. The first, an updated Ball Complete Book of Home Preserving, edited by Judi Kingry and Lauren Devine, discovered when I was out shopping with my mother, provided me with a Pickled Plum Recipe; the second was Jams, Jellies and Marmalades by Linda Arendt which Paul gave me as a gift; a wonderful primer or creative stimulus depending on your level of experience, for preserving, obviously, jams, jellies and marmalades.

I wasn’t exactly sure what quantities or kinds of fruit I would be receiving, all I was sure of was that it would be stone fruits from Washington State. I assumed peaches, which I was all ready to transform into a Peach Jam, one of my personal favorites, and hoped for plums as I had been wanting to try an old fashioned Pickled Plum.

Here is a Pickled Plum recipe from 1922:

Take 5 lb. ripe plums, 1 quart vinegar, 1 lb. sugar, 1 cupful of treacle, 2 oz. cloves, 3 chillies; wipe and prick the plums carefully with a fork, and place in earthenware jars.

Boil all ingredients for a quarter of an hour.

Pour the boiling liquid over the plums, and cover them at once.

Do not attempt to use them for one week, when their condition will be excellent.

Pickled Plums are traditionally served as an accomaniment to grilled pork, ham, or a cold roast beef platter.  The leftover syrup can be used as a basting sauce for spareribs or a home made barbeque sauce.

Not only did I receive fragrant peaches, and pretty little purple Italian plums, but big, bright nectarines as well. So without further adieu, I present to you the first recipe from my fabulous stone-fruit-sweet-preservation canning spree.

If you haven’t preserved fruit before, or would simply like to review safe canning practices visit Sweet Preservations’ link, Preservation 101. You can also review safe canning practices for using a Hot Water Bath here.


Peaches, Nectarines and Italian Plums from Starr Ranch Growers, Wenatchee, Washington.
To learn more about Starr Ranch Growers click here


PICKLED PLUMS


INGREDIENTS

2 1/2 to 3 lbs Italian Plums

1 1/2 inch  fresh Ginger, roughly chopped

1 hot Chilies, dried

2 whole Cloves

1 Cinnamon Stick (broken into pieces)

2 teaspoon Dried Citrus Zest (or 1 long Orange Peel)

1/2 teaspoon dried Nutmeg

3 1/2 cups lightly packed Brown Sugar

1 cups Cider Vinegar

1/2 cup Water


DIRECTIONS

Preheat oven to 275 degrees.

Tie the Ginger, Chilies, Cloves, Cinnamon Stick and Orange Zest  in a square of cheesecloth creating a spice bag.


In a non-reactive saucepan combine brown sugar, vinegar, water and nutmeg, along with the spice bag and bring to a boil over medium high heat, stirring constantly until the sugar has completely dissolved; about 10 minutes.

Wash the plums and prick each plum 6 times with a toothpick.

Place the plums in a baking dish, pour syrup over plums.  Cover tightly and place in pre-heated oven until plums are tender but still firm, 20 to 30 minutes.
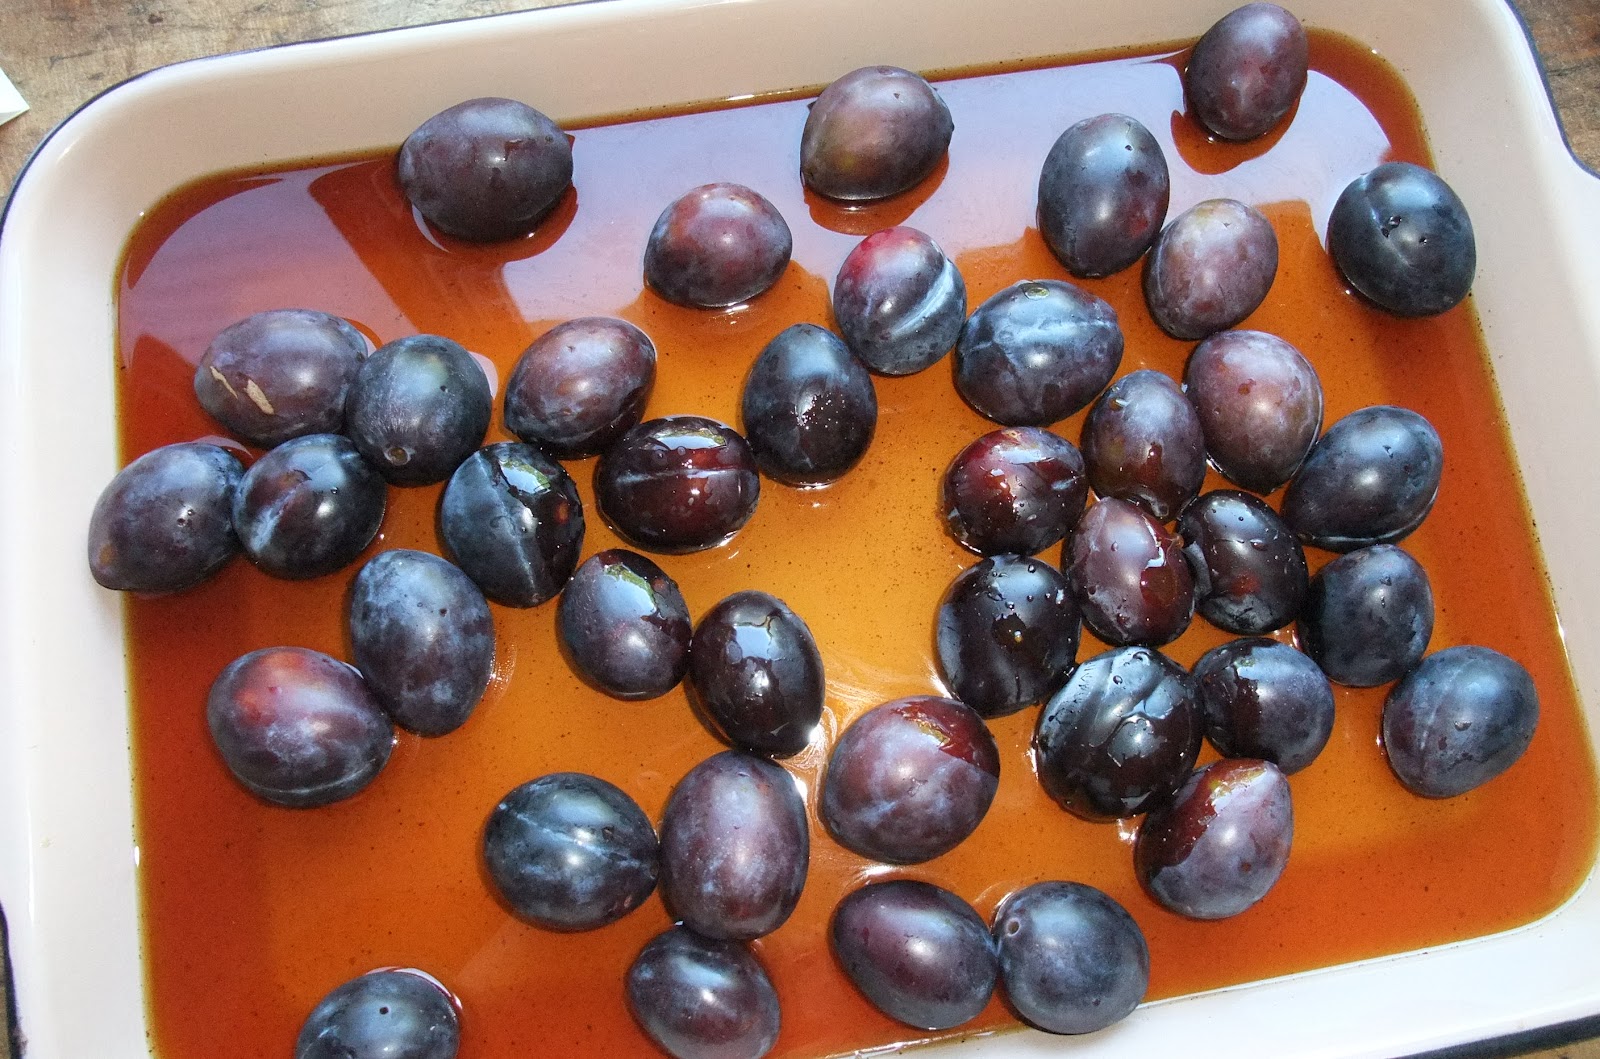


Using a slotted spoon, carefully pack the plums into hot, sterilized jars.


Pour syrup over plums leaving 1/2 inch of head space. Tap jars to remove air bubbles. Wipe the off rim, seal with hot sterilized lids. 

TIP: Fill each jar with syrup a little at a time.  If short, add a bit more cider vinegar to baking dish and warm slightly over stove top. Add to jars.

Place in Hot Water Bath 15 minutes, remove and rest on counter until cool.

Check the jars are sealed; keep shelved for at least two weeks before using.

Makes 4 pints or 2 quarts.


While I do believe in buying locally whenever possible, I also realize that shopping year-round at the grocery store, where  produce may or may not be from local sources, is a fact of life for millions of people. In a global market, purchasing fruits and vegetables produced here in America could still be considered 'local' (in the 'global' scheme), and is certainly still supporting American farmers and economy.

Wednesday, August 29, 2012

OLD FASHIONED TOMATO CONSERVE


Heritage Tomatoes from Paley's Farm Market in Sharon, Connecticut.

Bookmark and Share


Summer is winding down and loads of vegetables are coming out of local gardens. Here in the northeast it is officially tomato time, and there are so many ways to preserve tomatoes! Probably because when they are in season there are so many it is hard to know what to do with them, kind of like zucchini.

This conserve is based on a vintage recipe from an older Ball Blue Book with the cinnamon and cloves thrown in as a nod to Indian jams and chutneys and for the warmth these spices bring to the citrus tone, but they are optional and this conserve is good with or without them. 

Many similar recipes can be found categorized as tomato jam or tomato butter, but they all boil down to a thick, sweet tomato spread. The lemon juice and peel add acidity needed to make the tomatoes safe for preserving in the hot water bath, as well as pectin for help with the jelling process. If you are going to proccess this recipe in a Hot Water Bath you may add one tablespoon bottled lemon juice to each pint jar before adding your tomatoes.

It is very helpful if you have a candy thermometer, and make sure you have read through the recipe and have everything prepped, sterilized, and ready to go.  Once you have made the syrup, the canning process should progress rather quickly. 

Spread this conserve on warm rolls, serve as a side with a cheese plate, or as a spread for sandwiches.


OLD FASHIONED TOMATO CONSERVE


INGREDIENTS

5 pounds firm just ripe Tomatoes

2 pounds Sugar

1 lemon, thinly sliced

1 stick Cinnamon

2 Cloves


DIRECTIONS

Blanch the tomatoes in hot water and remove the skins. Cut into quarters, cover with sugar and allow to stand overnight. 

Drain off syrup; heat to the boiling point.

Once the syrup is boiling tie cinnamon and cloves (optional) into square of muslin, cheese cloth or jelly bag, suspend in mixture, also add lemon slices, continue cooking until syrup will spin a long thread  (230 - 235 degrees on candy thermometer). 

Remove bag of spices. 

Pack tomatoes into sterilized hot canning jars and carefully add hot syrup to 1/4 inch from rim.

Seal and process in Hot Water Bath for 15 minutes, or cool and store in refrigerator.

Cool and store processed jars in dark pantry for a year.

I made 5 half pint jars with this recipe.

Monday, July 30, 2012

REDISCOVERING THE CREAM PUFF


When I was growing up my mother cooked everything from scratch, she loved to cook - still does. I honestly did not know a pie crust could come from a box or the refrigerator section of the grocery store, that spaghetti sauce came in a jar, or that corned beef hash was sold in a can for quite a long time. In the spirit of 'preserving' I decided to revisit another one of my favorite childhood treats, my mother's recipe for cream puffs. 


Bookmark and Share

She made them small for finger-food appetizers stuffed with baby shrimp, egg salad, ham salad, and custards, cremes, or curds, or she would make large popovers then fill them with vanilla ice cream and drizzle with a fudge sauce. Such a special treat!  When  I asked my mother for the recipe for the 'popovers' she used to make, she told me she never made 'popovers', but she had a recipe for 'cream puffs'.

'Well, were the large ones popovers and the small ones cream puffs?"
I inquired. 

"I never made popovers," she insisted. "Those are made in the pan, Yorkshire Pudding, to serve with roast beef," she told me.  "I made cream puffs in two  sizes, large and small."  So she gave me her recipe for 'Cream Puffs',  and I started researching the difference between the two.  This is what I learned.

Before the advent of a reliable baking powder in the mid 1800’s, a few alternatives to making yeast-raised breads were popovers or cream puffs.

The popover (aka Yorkshire Pudding) is the first cousin of the cream puff, as they both contain the same basic ingredients in slightly different proportions. Yorkshire Pudding is actually popover batter made with drippings from roast beef and baked in a large pan. Popover batter is quite thin.

Cream puff dough, on the other hand, is thicker.  Both the popover and the cream puff are leavened by the steam that forms in the first few minutes of baking. Magically, simple mixtures of egg and flour pouf into fluffy, golden mounds.

Most likely the name popover came about because the batter ‘popped over' the edge of the pan when baked. In fact, cast iron pans resembling muffin pans, but with straighter sides, were made specifically for baking popovers.

There are so many “comfort” foods I can think of that came from our kitchen in the Old Mill, my childhood home nestled in a rocky bend of the East Aspetuck River in Connecticut. Everything from fresh trout dredged in flour and grilled in an iron pan to Bread and Butter Pickles to Country Captain Chicken ( which was my one of Uncle Dick's favorites), but when mom would entertain and create Cream Puffs, I and all my siblings, inevitably ended up in the kitchen staring through the oven window anxiously awaiting the rising of these versatile little treats.


CREAM PUFFS

Do not peek in at the cream puffs (or popovers) during baking. Opening the oven door lets in cool air, this will condense the steam inside the popovers and cause them to collapse.

INGREDIENTS

1 Cup Boiling Water

½ Cup Butter

1 cup Sifted All Purpose Flour

¼ teaspoon Salt

4 Eggs


DIRECTIONS

Preheat oven to 475 degrees

Bring water to a boil in large pot, melt butter in boiling water. Add flour and salt all at once; stir vigorously. Cook, stirring constantly, until mixture forms a ball that does not separate. Remove from the heat and cool slightly.

Add the eggs, one at a time, beating after each addition until smooth.
Drop by large, heaping tablespoons, about 3” apart on a greased cookie sheet.

Bake at 475 degrees 15 minutes, then lower temperature to 350 degrees and bake for another 25 minutes. DO NOT OPEN OVEN!

As the cream puffs complete the last few minutes of baking remove them from the oven, prick them with a fork or split open, to prevent sogginess. At this point, the structure of the popovers has been set, so they will not collapse.

Turn oven OFF and put the cream puffs back in the oven to dry, another 10 to 15 minutes.

Store in an airtight container. To crisp them up before serving place on a baking rack in       475 degree oven for about 3 - 5 minutes.

Just before serving, fill cream puffs with ice cream or lemon curd, creme fraiche or custard, drizzled with honey or fudge sauce or confectionery sugar, the possibilities are endless. 


Griswold Cast Iron Popover Pan


The following recipe for popovers comes from the Incredible Edible Egg website.  You can see from the ingredients that only a few degrees of difference separate Popovers from Cream Puffs.


POPOVERS

Don't have a proper popover pan? A muffin pan can be substituted for a popover pan. You can even place  6-oz. custard cups on a baking sheet and still make a beautiful popover.

 
INGREDIENTS

3 Eggs

1 Cup Milk

2 Tablespoons Butter, melted

1 Cup All-Purpose Flour

1/2 teaspoon Salt


DIRECTIONS

Heat oven to 425°F. Beat eggs in mixer bowl on medium speed until foamy. Beat in milk and butter. Reduce speed to low. Add flour and salt; beat until smooth, about 3 minutes.

Fill 12 greased popover pan cups 1/2 full with batter. Bake in oven until puffed, well browned and firm, 35 to 40 minutes.

For crisper popovers, pierce side of each popover with tip of knife and bake 3 to 6 minutes longer. Loosen edges with knife, if necessary. Serve immediately.


SWEET POPOVERS:  Add a spice or grated citrus peel to batter and serve with preserves or honey.


Monday, July 2, 2012

MABBETTSVILLE FRIED CHICKEN AND CLASSIC CREAMY COLESLAW

Bookmark and Share


I had spent the weekend cleaning and organizing dozens of boxes stacked in the closets and guestrooms of our newly acquired, old Victorian, culling through endless papers and receipts (Paul does not believe in throwing away ANY receipts or notepads, or scraps of paper with notes on them, or old lottery tickets - you get the picture) when lo and behold I uncovered a scrap of paper that had a Fried Chicken Recipe on it. This was not just any fried chicken recipe, this was the recipe scribbled quickly on one of Paul's sundry pieces of scrap paper by Brian, a previous line chef for the now closed Mabbettsville Market in Millbrook, New York. I scooped it up, set it aside to go in my recipe file. 

For me, meatloaf and mashed potatoes with gravy, a spicy chili and side of corn bread, or a hearty beef stew all constitute delicious, soothing comfort food, but discovering that little scrap of a recipe gave me a mighty hankering for fried chicken. Our freezer was full of chicken legs  and I had a half a head of cabbage in the crisper that I did not want to go to waste so I hummed hallelujahs and made plans to cook what I had just rememberes was another one of my favorite comfort foods, Fried Chicken with Creamy Coleslaw on the side.

Michel Nischan, sustainable food pioneer, chef, author and owner of Dressing Room Restaurant in Westport, Connecticut, helps remove the guilt factor that comes with eating fried foods by counseling,  "Like most fried foods, when done correctly, fried chicken is not bad for you. It should be enjoyed in moderation, but when you feel the urge to fry up some chicken, do it right."

Like barbeque, simply everyone has their own special trick for frying up the tastiest chicken, but I totally agree with Bon Appetit magazine, for a good fried chicken the skillet makes all the difference: "A cast-iron skillet--inexpensive and indestructible--is the prized frying vessel for a reason. It retains heat better than most pans, which helps regulate the oil temperature and ensures even frying. If you don't own one already, this recipe should provide ample motivation."

Since lard is not bad for you either, as long as it too is used in moderation, I use it (in my old Griswold cast iron pan) for frying the chicken. It imparts a wonderfully distinctive flavor and actually leaves the chicken less greasy. Learn how to render your own lard here.

Never fear, if you don't own a cast iron pan you can still make perfectly acceptable fried chicken in another heavy bottomed pan. I myself, momentarily lost my sanity and spent several years immersing chicken in canola oil using one of those made-for-the-home deep fryers: never again. 

This fried chicken, though, I will be having over and over.  Served up with a healthy side dish of a traditional creamy coleslaw or some potato or tossed green salad, it certainly makes for a comforting meal, no matter what time of year it is.


MABBETTSVILLE FRIED CHICKEN

 
INGREDIENTS

2 quarts Buttermilk or Whole Milk

1 Onion, minced

3 to 4 Garlic heads, sliced thinly

3 tablespoons fresh Thyme (1 Tablespoon dried thyme)

1/4 cup Kosher salt

Several grinds of freshly ground black pepper

One (2 to 3 pound) free range Chicken, cut into 8 pieces

OR all Chicken legs, backs, breasts - whatever your preference.


FLOUR MIX

2 cups All Purpose Flour

1 Tablespoon Onion powder

1 Tablespoon Garlic powder

1 Tablespoon fresh Thyme (or 2 teaspoons dried)

1 Tablespoon Cayenne Pepper

1 teaspoon dried Coleman's Mustard

Kosher salt and freshly ground Black Pepper


FOR FRYING

3/4 to 1 Cup Lard (or Canola Oil)

Cast Iron Skillet or heavy bottomed pan with Cover


DIRECTIONS

Warm 1 quart of (butter) milk  in a saucepan over medium heat. Remove pan from the heat. Add the onion, garlic, and thyme. Set aside to come to room temperature. Season with salt and pepper, using enough salt so that the you can taste it.

When the (butter) milk is nearly cool, pour in a dish large enough to hold the chicken pieces. stir in the remaining 1 quart cold (butter) milk. Add your chicken, cover, and refrigerate for a minimum of  2 hours and up to 4 hours, turning occasionally. Drain the chicken, pat dry. Throw away the milk marinade.

To make the flour mix, mix together the flour, onion powder, garlic powder, thyme, and mustard in a shallow dish. Season with salt and pepper. Put the chicken pieces in the flour. Turn to coat. Let the coated chicken pieces sit for 10 to 15 minutes.

Heat your skillet over medium-high heat. When hot, heat the lard until liquified and so hot it is nearly smoking. Using tongs, lay the chicken pieces in the hot fat, which should come about halfway up the sides of the chicken.

Cover and let fry for 3 to 4 minutes, then turn the pieces over. Watch the chicken carefully, turning as needed to brown evenly on both sides and cook through, about 25 to 30 minutes total. (The smaller pieces might be cooked through in 20 minutes.) Adjust the heat if necessary to prevent scorching, but try to keep it as high as you can. Watch out for splatter, you don't want to get burned.

Lift the chicken pieces from the hot fat as they are cooked. Drain on paper towels, set in baking dish in a warm oven until all your pieces are cooked. Serve hot with your prepared side dishes..


Tossing together the Creamy Coleslaw


CREAMY COLESLAW


INGREDIENTS


1 head Cabbage, shredded

1 Yellow Onion, shredded

1 large Carrot, shredded

2 Tablespoons Honey

1 Tablespoon Celery Seed

5 Tablespoons White Vinegar

dash Cayenne Pepper

dash Garlic Salt

Mayonnaise, Salt and Pepper to taste


DIRECTIONS

Mix Honey, Vinegar, Cayenne Pepper,and Garlic Salt over low heat until honey is incorporated. Remove and let cool.

In the meantime, put Cabbage, Carrot, and Onion through food processor to shred.

Once the Vinegar/Honey mix is cooled, coat slaw well (slaw will lose volume as it sits, so this will be enough dressing). Sprinkle with Celery Seed. Refrigerate.

When ready to serve add Mayonnaise to taste, Salt and Pepper to taste.